Showing posts with label christmas. Show all posts

Monday, December 26, 2011

More Christmas projects!

I managed to make and wrap several of my Christmas project before photographing them, so I only just managed to get photos now! Oops. :)

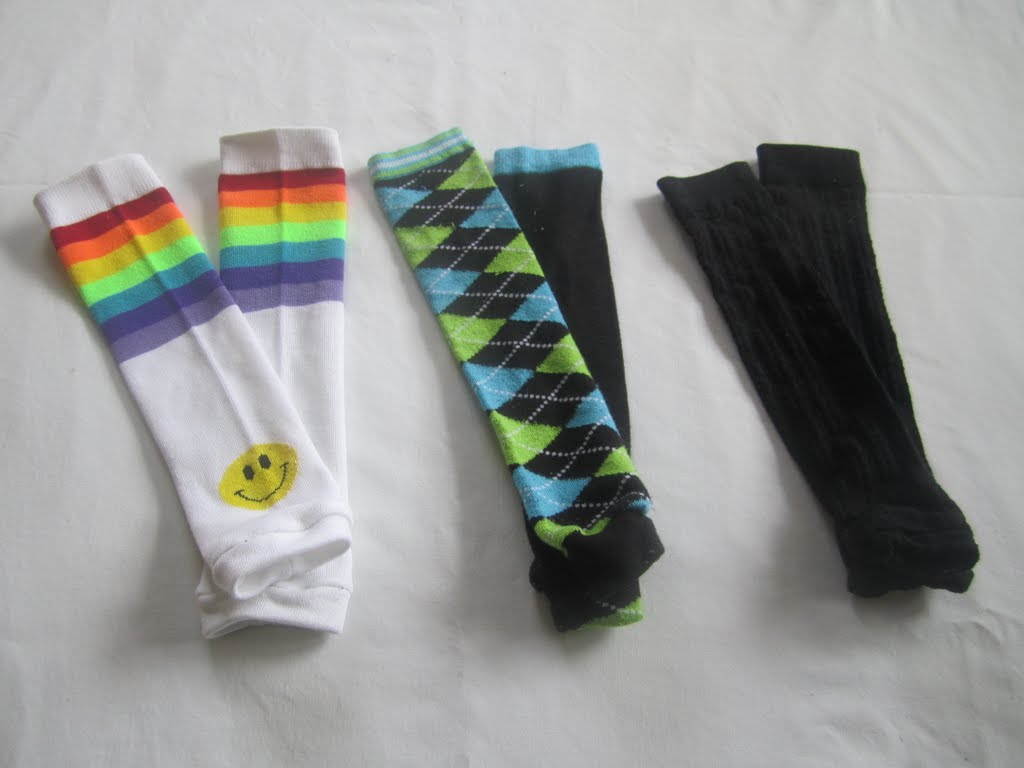
Baby legwarmers for our little guy (tutorial here).
Nubbie dolls for both kiddos (tutorial here).
And two simpler ones for a friend's two babies.
Wrench rolls for my husband! This was quite the involved project.
I will be posting my process photos and explanation of how I put them together later.
A stop sign for across the door to the tree (a family tradition in my family).
Coordinated pjs for the kiddos. I'm quite proud of these, even if the baby's outfit ended up being 6 months too large (it SHOULD have fit him, I'm not sure what was going on with the pattern sizing).
A cute little hat for our daughter. It makes me think of a cupcake every time I see it. (The basic hat pattern is based on this one.)
Crocheted balls for our little guy (tutorial here). These are quick and easy, I'll probably be making some more in the next couple weeks.
Well, they're more for our daughter to throw around the room and they won't hurt our little guy. Win-win!
A booster seat cushion to replace the booster seat for our daughter. She's a big girl now! I made it using iron-on vinyl and I think I've sworn never to use the stuff again. Talk about hard to work with!
And this last thing I actually just made today: a little house for our daughter's new night light. The little glowing animal was a bit too bright, so I put together a felt house to help reduce its light out-put and then added curtains to pull across. Our daughter was quite excited about having a house for her "little glowing friend."


That's what I've been up to for the past several weeks! Busy, busy, busy! :) Our daughter's 3rd birthday is in a month, so I've got more things to work on! :)

~Regina

Saturday, November 26, 2011

Busy, Busy--Christmas Projects!

If you're anything like me, you're scrambling around trying to find time to complete all of your project ideas for Christmas gifts. :) Of course, most of my gifts are for my kiddos. Here's a selection of what I've done so far:

A cool pyramid pillow for my daughter. Tutorial here.
A stocking for our baby boy. I finally got on the ball and made one for my daughter last year (her 2nd Christmas), so I was quite proud of myself that I managed to get this one done with a 2 month old hanging around. :)
My mom cross-stitched the cuff for me. She made stockings like this for our whole family when I was young and has continued to make them (or at least the cuffs) as the family has added in-laws and grandkids. What a special tradition!
Another project was "blanket pajamas"  requested by my daughter. She picked out the fleece by herself and is very pleased with the pjs.
I followed this tutorial and got the idea for the foot cuffs from the Halo website (since they make sleep sacks this large!).
I LOVE the footholes/cuffs! You know what I made these from? The leftover foot portion of very long knee-high socks that I used to make legwarmers for the baby, a la this tutorial.
And then I decorated our Advent "wreath" so that it looked a little more Christmas-y.

And since there were only places for 4 candles and we had a 5th (to be lit on Christmas day), I needed to make our Christ candle look nice and pretty.
I just wrapped the candle in ribbon, hot glued it to itself at the back (careful of the wax--don't want to melt it!) and then added the second bow. I love how it looks! :)

I forgot to take pictures of the loveys I made for the kiddos (and a couple friends) and the legwarmers I made the baby. Maybe next time.

Still on my list are matching winter pjs for the two kiddos (maybe I can find more of that fleece I made the sleep sack from), a gift for my husband (can't say what since he'll see this post), a booster seat cushion cover, a tree skirt, and some random ornaments or wall hangings that I have yet to design. :)

Happy crafting!

~Regina

Wednesday, October 26, 2011

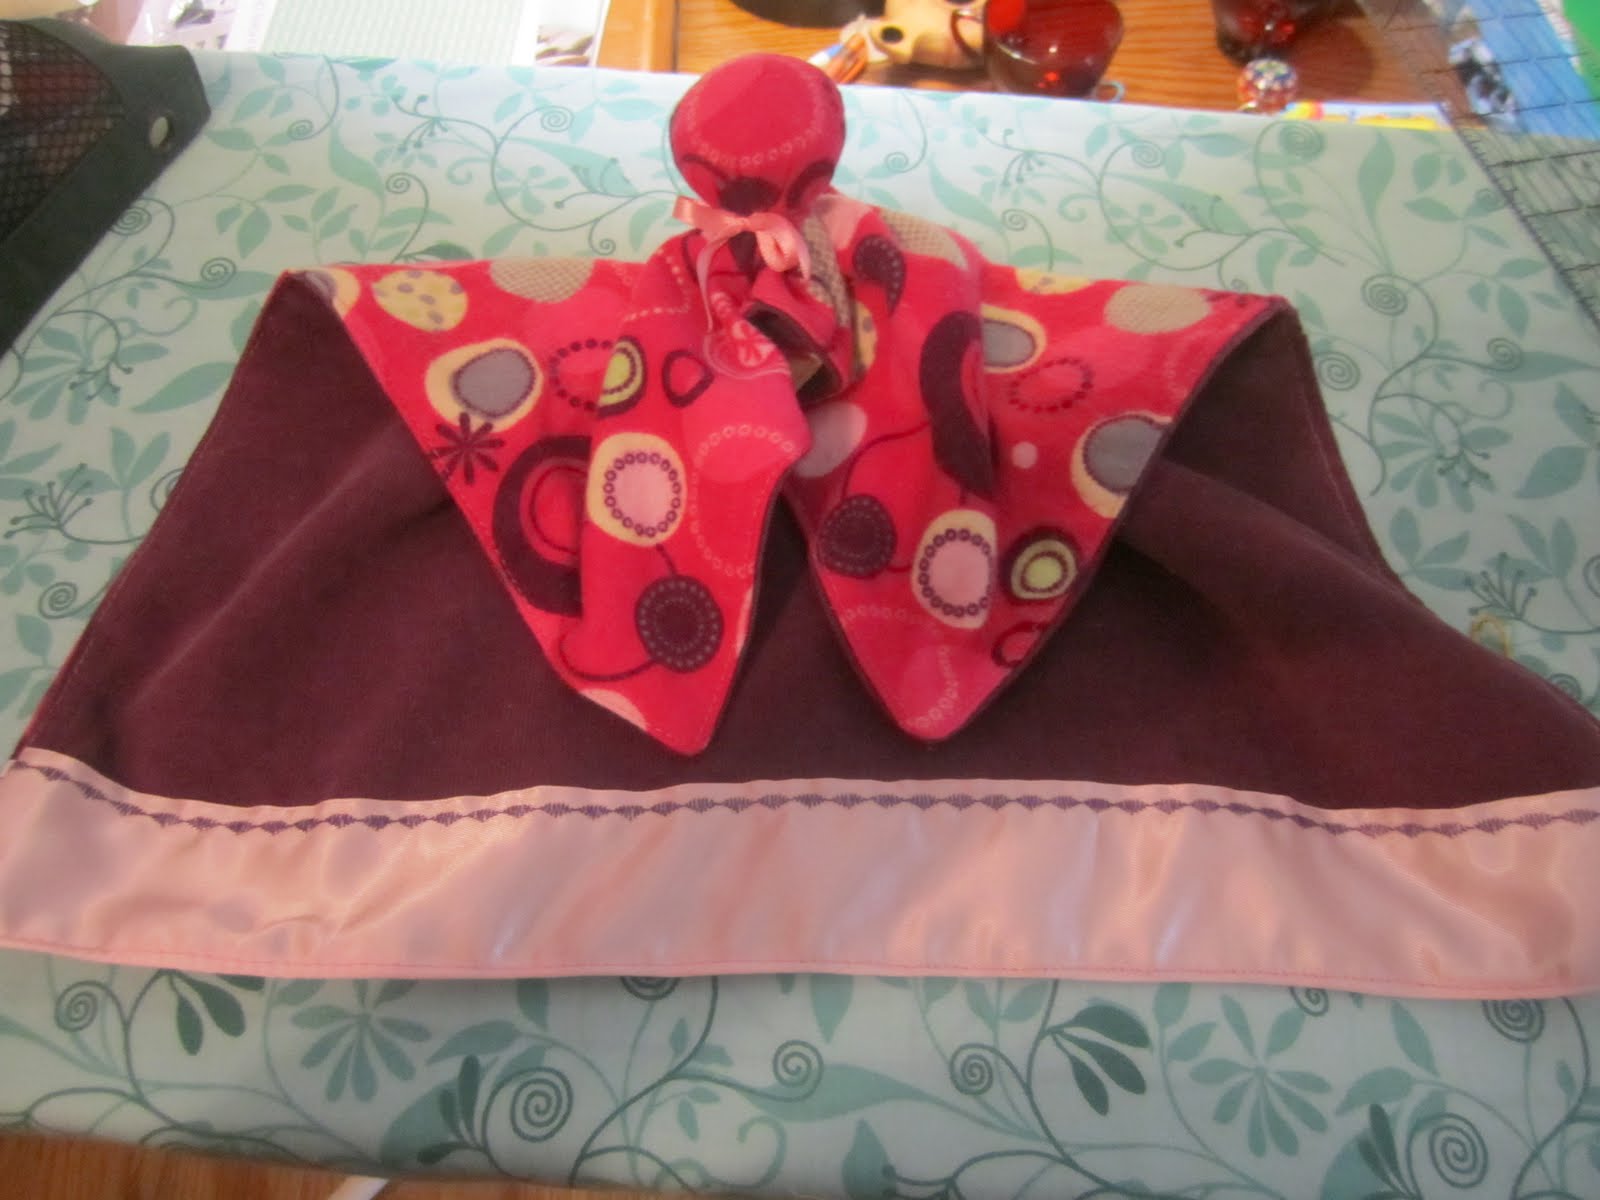
Nubbie Doll

The baby is 6 weeks old, guess maternity leave is over! ;)

Before our little guy was born, I spent some time looking at the wide variety of loveys available on the market. I loved how the Cuski looked, but not the price tag, so I set out to find something similar. I found the Nubbie Doll at WeeFolkArt.


I had decided I was going to make two of these as stocking stuffers for our kiddos. Then our church started the drive to collect Operation Christmas Child boxes and I realized that one of these would be a perfect little doll/lovey/thing to include in a box! Actually, I have to thank my mother in law for really being the one who gave me this idea since she had mentioned including simple hand-made loveys in boxes in years past. I just hadn't thought about it until I was looking at the tutorial for this little doll.


This little doll is super easy to make. I made it more complicated by using two fabrics rather than just one, but it still is super-duper easy. I loved the bright pink flannel and I backed it with the deep purple corduroy. The fabrics are sooo nice and soft. I hope they hold up well for whoever gets this gift!


I had fun with the decorative stitches on my machine. I hadn't had a reason to use them yet (I've had the machine for only about a year), so it was great to have a reason to flip through all of them.


The head itself is pretty easy and not too big. The doll is the perfect size for little hands and will pack nice and compactly in the shoe box! I may experiment with the shape of the doll with the ones I make for my kiddos, but I really like the way this doll turned out. It's perfect for a Christmas shoebox.

I decided just to show my little doll off rather than writing up a full tutorial since the WeeFolkArt one is nice and clear... and I have a fussy baby on my lap.

~Regina

Thursday, December 16, 2010

Fun Christmas Stuff Around our House

First off, we have our Christmas tree.  Now, with a very curious, active toddler, I was stumped as to what to do about ornaments.  Sure, they make those "unbreakable" ones, but neither my husband nor myself were sure that they would stand up to our daughter.  One day, we wandered around the discount store, looking for ideas when my daughter picked up a package of golden jingle bells and gave them a shake.  As I turned towards her to make sure she wasn't about to break anything, my eye caught another package of red jingle bells. And thus, our Christmas tree ornaments were found....

After bedtime and clean up, our tree looks like this:
During the day, it looks more like this, and this is on a good day:
The poor little bells spend more time on the floor than they do on the tree, but at least my daughter has fun running around shaking them!

Second, we have three ice wreaths that I had fun creating from various left-over craft supplies that we had laying (lying? I can't ever get those straight.) around.  The original idea is over here and she made some gorgeous wreathes!
Mine were mostly colored string and ribbon. Nothing special, but still fun.
This morning I noticed that the wreaths were "growing" icicles! How fun!
Third, we have our over-the-door swag thingie. ;)  It's just lights, ribbon, and glass ornaments. I'm rather pleased with how it turned out.
It was difficult to get a full picture of (daylight coming through the doors), so you'll just have to fill in the gaps...
Finally, since my daughter loves bells so much right now, I found some larger bells on sale at joann's and made a bell door knob hanger.  To do it, I learned how to loop braid ribbon and how to make korker spiral ribbon.  For loop braiding, you can do it with one color or two colors.  For the korker spirals, I found this blog and this blog most helpful.  Everyone had slightly different ideas about how to do them, but the idea is all the same, so I just mish-mashed it together and mine turned out great!
Well, my daughter is knocking on her bedroom door to be let up from "naptime."  Coming soon: how to make cinnamon rolls with my basic bread dough recipe! Mmmmm!

~Regina

Thursday, December 2, 2010

Advent Calendar: Part 2!

Part 1 of this tutorial is here!

So, you have now washed and dried your socks--maybe more than once.  I found as I worked with the socks that the red dye hadn't been completely washed out of the socks, so I got a few red marks on my ironing cloth later on. It wasn't a big deal, but next time I dye something I'll wash it twice before using it.
 And you have your stencils--if you're planning on painting your numbers onto your socks. In the original idea (from Martha Stewart), number stickers were stuck to the socks so that they could be re-used. I didn't care about re-using the socks, so I was going for permanent.  I made my stencils out of freezer paper.  Amy over at naptime crafters has a good explanation of how to make and use freezer paper stencils.  I just cut my paper to 8.5x11 inches, printed the numbers onto the non-shiney side (very important!) and then cut the numbers out with an exacto knife.  It didn't take as long as I expected it to.
 I laid my socks out on my ugly ironing board and rearranged them until I liked what I had.
 Then I laid out my numbers...
 ...and ironed them on!  Now, as you will see later on, I used too hot of an iron OR freezer paper doesn't do well with sock fabric.  I'll show you later how the plastic-y part of the freezer paper didn't want to come off of my sock.
 Back to our current activity: line up the socks in whatever way works best for you.
 Squirt out some fabric paint and get to work!
 I used my finger to put the paint down--it just works best for me.  Normally I would recommend putting a protective layer of something like paper between the two layers of the fabric, but the sock fabric was thick enough that the paint didn't soak through.

Here's the first layer of paint:
 Second layer:
 Again, first layer:
 Second layer:
 I stopped at two layers of paint, though some of the red socks could have handled a third.  Hung up, they look just fine.

Now, on to 24 hours later, after the paint has dried.  I tried to pull off the freezer paper...the paper part came right off, but not the plastic! (Note: please see the update farther down in this thread--or read on if you're looking for how to remove iron-on appliqué plastic.)
 Uh oh...
 So I tried the blow drier. It didn't work.
 What I ended up doing (and managed to not take any pictures of), was heating my iron up to its hottest setting (cotton) with no steam.  Then I laid an ironing cloth over it--mine is just a light weight "flour sack" dish cloth--and ironed the heck out of it.  When I lifted the paper off of the sock, some of the plastic-y stuff came away, but not all.  So I put the cloth back over the sock and ironed more. The ironing cloth lifted some of the plastic-y stuff away from sock and eventually the socks looked pretty good (and my ironing cloth got a bit stiff).
 You can still see a bit of residue where the freezer paper was adhered, but it's much, much better than it used to be. (Oh, and notice my new ironing board cover--thank you Black Friday!). :)
 It took forever--an entire naptime--but I eventually got all of the socks looking pretty good.

UPDATE: I figured out what went wrong with my iron-on stencils. I thought I was using freezer paper, but I was not. I mindlessly grabbed the paper roll stored next to my freezer paper, which happened to be my Heat-n-Bond No Sew Iron-on appliqué paper! No wonder the plasticy part didn't come off--it wasn't meant to! What's even worse is that I started to do it again and thankfully caught myself and saved that project. *headdesk*

So we hung them up!  I used some of those metal ornament hooks. I just hooked them through the sock fabric and squeezed the end shut. I secured a ribbon to the wall (the ribbon ended up being about 60 inches long) and spaced out my socks as evenly as possible.
 We will use candy canes to mark the days that have passed.  I can't wait to start using it!
That's all for now!

~Regina