Our daughter's birthday was coming up when I stumbled across
this cute idea for a woven ribbon pillow. But the plain square pillow didn't have enough pizazz, so I decided to try something different. I love it! And so does our 3 year old. I told her that whenever she sees it, she can remember that it means that Mommy loves her. She likes to throw herself on her bed and hug it, then she brings it to me and says, "It means Mommy loves you!" So sweet. :)
Rosmademe did a nice tutorial, but I thought I would walk through the process here, too. I gathered all my supplies, including paper, tape, and scissors to make my heart shape.
I taped up the paper, folded it in half, and cut out a heart shape. My heart ended up being 16 inches long by 15 inches wide.
I traced the heart onto some muslin.
Then I ironed sewable fusible bonding stuff (HeatnBond sewable/lite bonding web) onto the other side of the muslin. I wanted my traced heart to be on the back side of everything so that I could see it after I had woven all of my ribbons. Pull off the paper backing so that the sticky-ish side of the webbing is exposed.
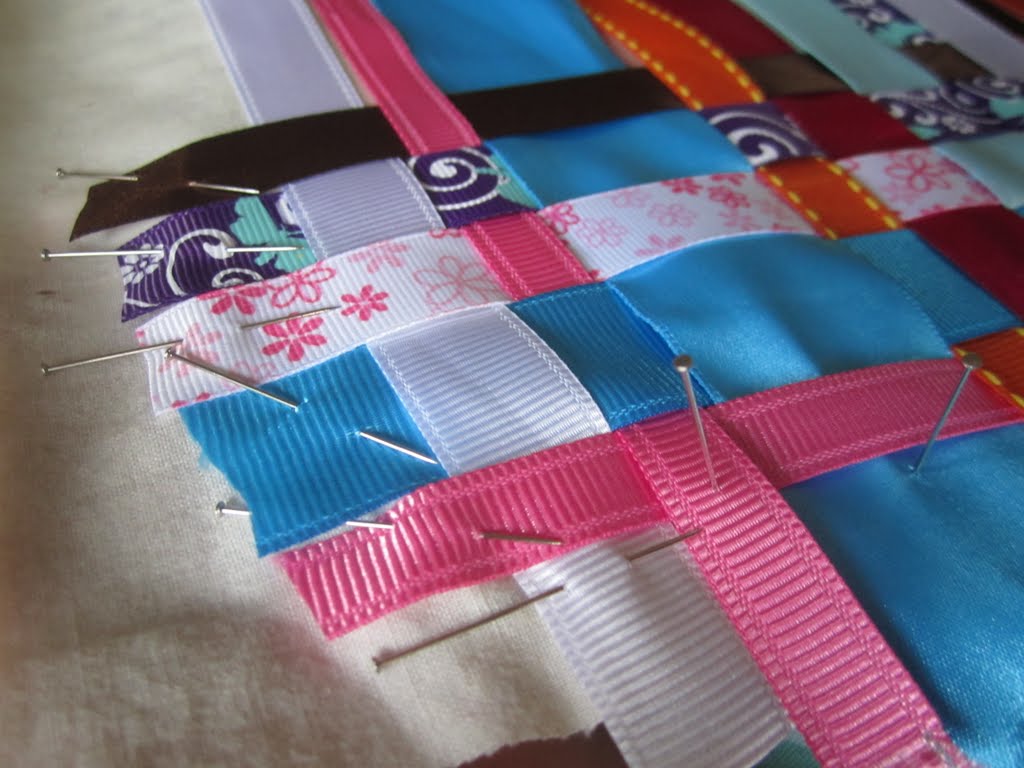
Line up all your ribbons and pin them down on both ends. I wanted to do mainly warm colors (orange, pink, red, brown, etc.) but included some blues, too. I changed my mind later and actually pulled most of the blue ribbons out of the finished weaving and re-weaved some different ribbons to keep the theme warmer.
Start weaving! I did just a basic weaving pattern: over, under, over, under, etc.
You can see better here how I pinned the ribbons down.
I finally finished weaving! This took me about 1.5-2 hours to finish--an entire naptime. You can see that I replaced the vivid blues with pinks, but left a few lighter blues.
Cover all the ribbon with an ironing cloth and iron away! Ironing was hard work. I found that I had to warm my iron up to medium high (rather than the medium that HeatnBond calls for) since there were so many layers to work with.
Not all of my ribbons bonded easily, so I did have to leave a few pins in here and there while I stitched. I sewed a line all the way around my heart outline, about a 1/4 inch to the outside of it. This line of stitching was just to hold it all in place.
Front side of the stitching.
Then I trimmed it up. Yay, it looks so pretty!
I took some pre-made satin binding and ironed it flat. I used that for the sides of my pillow. I was going to just sew the back of the pillow right to the front, but then I thought that adding a side (wall?) might make it a bit more fluffy. I also added an extra strip of muslin the same width as the satin to reinforce the satin. It seemed like a good idea, but it might have been overkill.
I sewed it all around the front (right sides together!). Then I sewed the back of the pillow on (right sides together again), leaving a gap of about 5 inches for turning. Before turning, I clipped and notched all the corners of the heart and ironed the seams over toward the front of the pillow. I tried turning it right side out without ironing the seam, but they were so stiff that they were deforming the pillow, so they needed a good ironing.
Turning it right side out!
Flat pillow from the back.
Flat pillow from the front. Almost done!
Stuff pretty stiffly since stuffing seems to squish over time and sew the gap closed with an invisible ladder stitch. All done!
All together, I think this project took me about 7 hours. So there's enough time between now and Valentine's Day for you to make one! ;)
If you shop at Hobby Lobby, they have these ribbon remnant bags in the ribbon-sold-by-the-yard section. Each bag has a bunch of ribbons that are each about 2 yards long. One of those bags is plenty for this project.
Happy sewing!
~Regina