OK, so this post is mostly for my mom so that she can see the sweet stegosaurus I made for my soon-to-be-a-big-brother nephew. I actually missed his birthday back in April, but I'm sure he'll forgive me (as if he cares!) when he receives his stegosaurus.
I started off with this image and enlarged it with a handy-dandy enlarger/projector thing that my mother-in-law found at a garage sale. I wasn't sure what I would do with the thing, but I think it's pretty awesome now that I've played with it a bit. I traced the enlarged image and cut out all the different pieces to make my pattern. The most challenging part was the gusset for the legs and belly so that he wasn't just flat. I'm quite proud of my first stuffed animal!
I haven't taken the stegosaurus's exact measurements, but I think he's around 30 inches long and 18 inches tall (without measuring his spikes).
That's all for now, but I am working on another stuffed toy for my almost 1 year old boy. I'll post pictures of that once it's done! :)
~Regina
Showing posts with label toy. Show all posts
Sunday, September 9, 2012
Wednesday, October 26, 2011
Nubbie Doll
The baby is 6 weeks old, guess maternity leave is over! ;)
Before our little guy was born, I spent some time looking at the wide variety of loveys available on the market. I loved how the Cuski looked, but not the price tag, so I set out to find something similar. I found the Nubbie Doll at WeeFolkArt.
I had decided I was going to make two of these as stocking stuffers for our kiddos. Then our church started the drive to collect Operation Christmas Child boxes and I realized that one of these would be a perfect little doll/lovey/thing to include in a box! Actually, I have to thank my mother in law for really being the one who gave me this idea since she had mentioned including simple hand-made loveys in boxes in years past. I just hadn't thought about it until I was looking at the tutorial for this little doll.
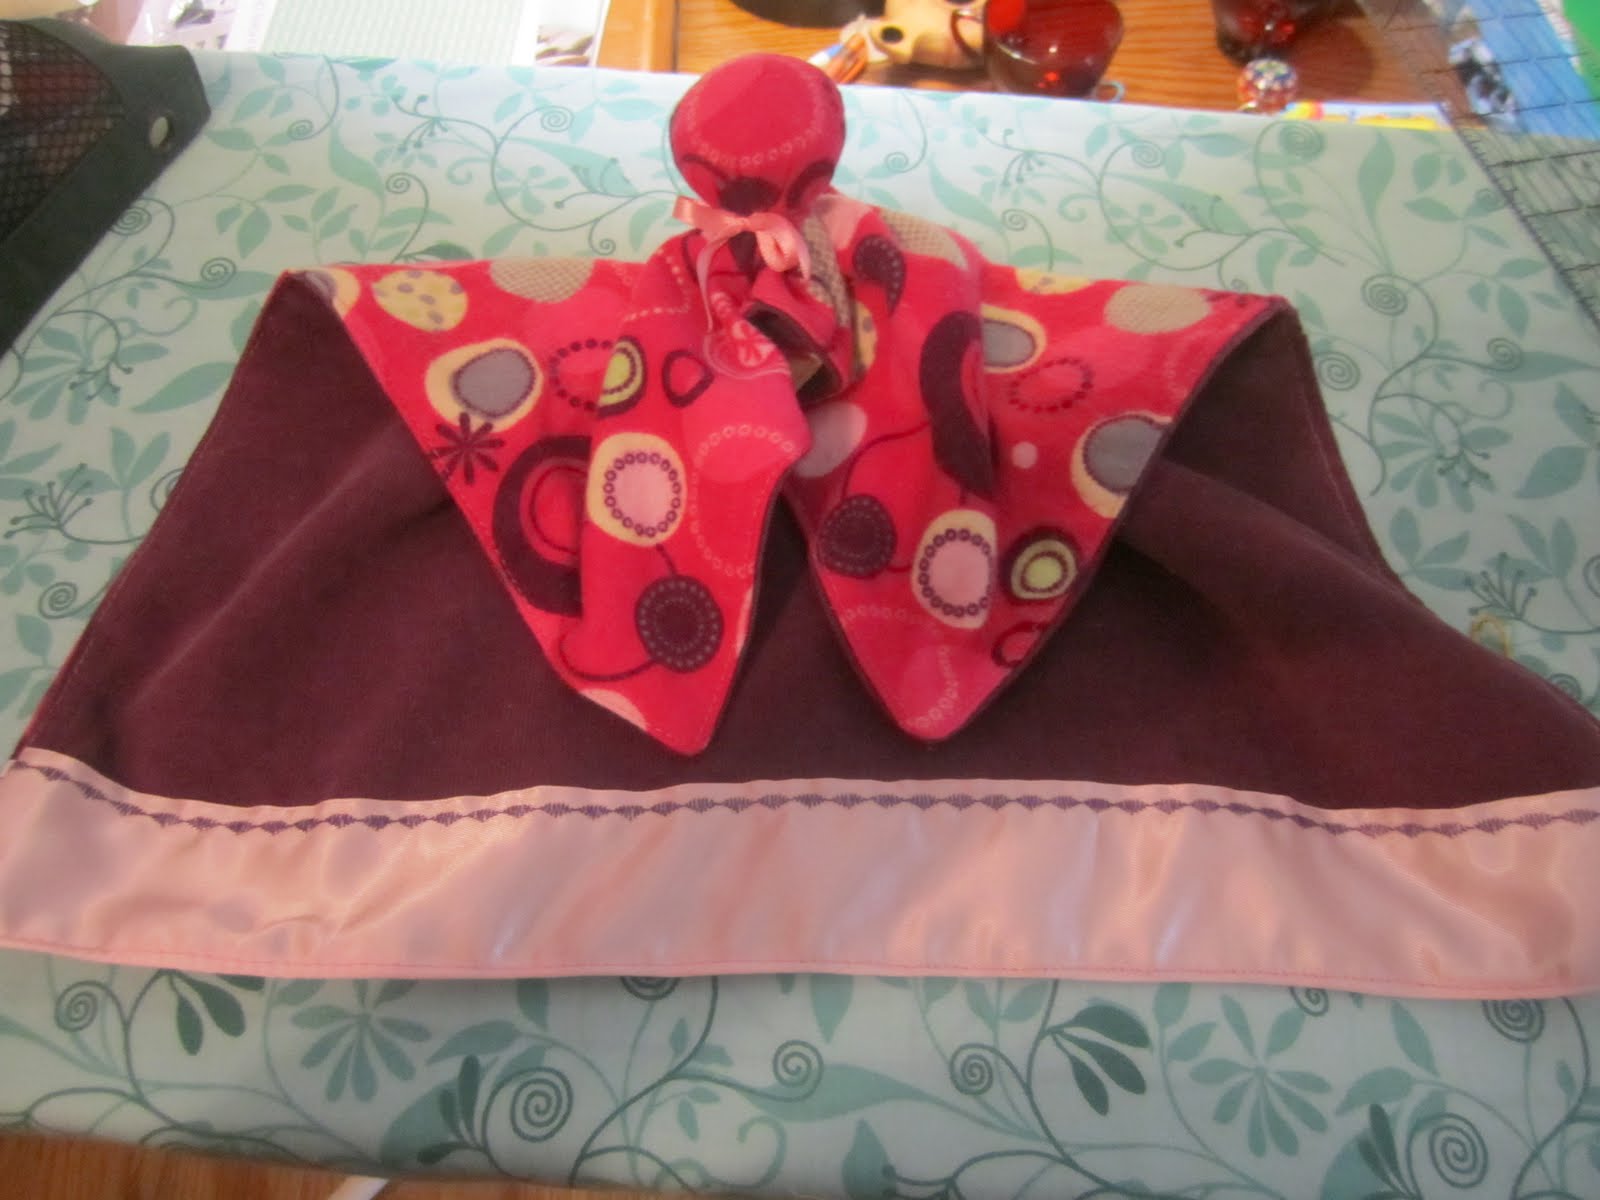
This little doll is super easy to make. I made it more complicated by using two fabrics rather than just one, but it still is super-duper easy. I loved the bright pink flannel and I backed it with the deep purple corduroy. The fabrics are sooo nice and soft. I hope they hold up well for whoever gets this gift!
I had fun with the decorative stitches on my machine. I hadn't had a reason to use them yet (I've had the machine for only about a year), so it was great to have a reason to flip through all of them.
The head itself is pretty easy and not too big. The doll is the perfect size for little hands and will pack nice and compactly in the shoe box! I may experiment with the shape of the doll with the ones I make for my kiddos, but I really like the way this doll turned out. It's perfect for a Christmas shoebox.
I decided just to show my little doll off rather than writing up a full tutorial since the WeeFolkArt one is nice and clear... and I have a fussy baby on my lap.
~Regina
Before our little guy was born, I spent some time looking at the wide variety of loveys available on the market. I loved how the Cuski looked, but not the price tag, so I set out to find something similar. I found the Nubbie Doll at WeeFolkArt.
I had decided I was going to make two of these as stocking stuffers for our kiddos. Then our church started the drive to collect Operation Christmas Child boxes and I realized that one of these would be a perfect little doll/lovey/thing to include in a box! Actually, I have to thank my mother in law for really being the one who gave me this idea since she had mentioned including simple hand-made loveys in boxes in years past. I just hadn't thought about it until I was looking at the tutorial for this little doll.
This little doll is super easy to make. I made it more complicated by using two fabrics rather than just one, but it still is super-duper easy. I loved the bright pink flannel and I backed it with the deep purple corduroy. The fabrics are sooo nice and soft. I hope they hold up well for whoever gets this gift!
I had fun with the decorative stitches on my machine. I hadn't had a reason to use them yet (I've had the machine for only about a year), so it was great to have a reason to flip through all of them.
The head itself is pretty easy and not too big. The doll is the perfect size for little hands and will pack nice and compactly in the shoe box! I may experiment with the shape of the doll with the ones I make for my kiddos, but I really like the way this doll turned out. It's perfect for a Christmas shoebox.
I decided just to show my little doll off rather than writing up a full tutorial since the WeeFolkArt one is nice and clear... and I have a fussy baby on my lap.
~Regina
Labels:
blanket,
christmas,
doll,
easy,
lovey,
nubbie,
operation christmas child,
quick,
stocking,
stuffer,
toy
Subscribe to:
Posts (Atom)