...And, well, I'll show off some pretty spit-up cloths, too. :)
I'm sorry for posting late, we've been taken out by seasonal allergies. I've hardly done any sewing this week.
I finally finished my friend's spit-up cloths for her baby girl. I had tons of fun picking out fabrics and playing with the gorgeous colors. This sweet baby girl is going to have not only great, practical spit-up cloths, but also soft terry-backed cloths with ruffles and ribbon tabs. She also got the chenille cloths I made a while ago.
These more practical spit-up cloths are made from a panel of flannel sewn onto a cloth diaper. How big you make the flannel is up personal preference, but I like to cut my flannel to 19 inches long by 7 inches wide. This is just big enough to cover the center, extra-layered part of the cloth diaper after all the raw edges have been turned under.
Iron the long sides under and attach a ribbon along the edge. I like to use satin 3/8inch ribbon, but wider ribbon could be fun and grosgrain works well, too.
Then attach the whole thing to the cloth diaper. Easy as pie! Make sure your bobbin thread matches the cloth diaper's color. If your tension is balanced, then neither should show up on the other side.
Pink on top!
White on the bottom!
All done! So easy and cute!
Here's my stack!
The other set has ruffles and ribbon tabs--perfect for little hands to enjoy.
So fun!
Which one is your favorite?
~Regina
Showing posts with label pretty. Show all posts
Friday, March 16, 2012
Wednesday, March 7, 2012
Homemade Chenille Spit-Up Cloths
Well, I made it into the next round of Every Creative Endevour's Creative Bloggers Got Talent contest! And the project that got me into the next round was these beautiful homemade chenille spit-up cloths.
A dear friend of mine is having a baby girl in May. She asked me to make some spit-up cloths and I took it upon myself to make her some of the most beautiful, soft spit-up cloths I could. :)
Before our baby boy was born, I learned about homemade chenille. I decided to experiment with it a bit on a small scale, so I sewed some small pieces up and attached it to some cloth diapers to make spit-up cloths. It turned out that these spit-up cloths are the best spit-up catchers in our house. Besides looking really interesting, they also have a great texture that our baby loves to feel. So, of course, I had to make some for my friend, but I didn't want them to just be boring straight lines. Nope, I decided to be crazy and do spirals and ripples. The ripples were pretty easy, but the spirals were definitely more ambitious. Ready see how I made them?
I like to use flannel for my chenille, but any looser-woven cloth will do well. Choose colors that blend well together and match the other side of what will become your spit-up cloth. I chose to use only 3 layers of flannel since I was going to make the chenille ridges pretty short. Cut the fabrics and a base layer to sew them onto to size. These cloths were cut to be 17x17 inches. Choose your color order and it's time to really begin! I have found that having the lightest color on top gives the design the most definition, as you will see in the following pictures.
I decided that I would be stitching with the base layer up so that I could see my stitches, so I laid all the fabrics on top of each other in opposite order. Then secure them. If you have some of that sticky fabric spray, then that would work best. If not, use lots and lots of pins. You can use quilt-basting safety pins, but I prefer to use straight pins so that I can remove them easily. I also marked the quadrants of the cloth on the back to help me arrange my designs.
To make the spirals, I marked my center and then marked dots like so at 1/4 and 1/2 inches from the center. I recommend doing slightly wider channels than 1/4 inches--the channels were close to too small for cutting on curves. Straight channels would be a different story.
Then I connected the dots to give me my first several spirals.
Once you have your spiral going, you can just approximate your way around or use your presser foot at a guide.
I sewed this spiral until I ran off the edge.
I filled in the corner and expanded the spiral a bit before moving onto the second spiral.
Two spirals!
I filled in the rest of the spit-up cloth with little Vs following the curves of the two spirals.
All done with the sewing!
I love my Olfa chenille cutter, it makes cutting the channels so much easier! But you still have to be careful that you don't cut too close to the lines of stitching. I also had some channels that were too narrow for my cutter to get through, so I used my seam ripper.
Unfortunately, I had a few accidents in the cutting. To fix the gaps, I whip stitched the raw edges together...
Ironed a patch on using sewable fusible web...
And then stitched on each edge and the middle, following the stitching above, to secure the patch. Good as new!
Add the backing and binding before washing! Here's the front, ready to wash...
And the back! I love these colors.
Now the ripples....I decided to just do kind of organic, free form ripples. I had tried something more exact, but that didn't work out and I ended up having to tear out 6 lines of stitching, which was super annoying. I made this ripple cloth as a back-up in case the spiral one failed.
I sewed one initial line and then just kind of followed it the rest of the time. Sometimes I had to stray from the original line to make more ripples because it started smoothing out over time. I enjoyed how it felt kind of spontaneous. :)
This is the spiral one, freshly washed. If you click on the picture, it should get bigger. You will see that it's a bit shaggy. Those shaggy parts are where I failed to keep the spiral curved enough to stay on the bias. I ended up having to give it a hair cut. Then I washed it again and it got a little bit shaggy again, so it got a second hair cut. I'm pretty sure that it won't be too shaggy with subsequent washings...I hope. The ripple cloth had some very minor shagginess, but nothing that was a big deal.
Our little guy LOVED looking at the spirals--I may have to make one of these for him.
Sweet little hands.
Ripples! I like how the colors on this one turned out better. I just inverted the colors. The spiral cloth's colors are: light pink, dark pink, then orange; the ripple's colors are: orange, dark pink, then light pink.
And, finally, a fully shot because it drives me crazy when blog posts don't include a picture of the full project. :)
And there you go! Feel free to ask any questions!
~Regina
A dear friend of mine is having a baby girl in May. She asked me to make some spit-up cloths and I took it upon myself to make her some of the most beautiful, soft spit-up cloths I could. :)
Before our baby boy was born, I learned about homemade chenille. I decided to experiment with it a bit on a small scale, so I sewed some small pieces up and attached it to some cloth diapers to make spit-up cloths. It turned out that these spit-up cloths are the best spit-up catchers in our house. Besides looking really interesting, they also have a great texture that our baby loves to feel. So, of course, I had to make some for my friend, but I didn't want them to just be boring straight lines. Nope, I decided to be crazy and do spirals and ripples. The ripples were pretty easy, but the spirals were definitely more ambitious. Ready see how I made them?
I like to use flannel for my chenille, but any looser-woven cloth will do well. Choose colors that blend well together and match the other side of what will become your spit-up cloth. I chose to use only 3 layers of flannel since I was going to make the chenille ridges pretty short. Cut the fabrics and a base layer to sew them onto to size. These cloths were cut to be 17x17 inches. Choose your color order and it's time to really begin! I have found that having the lightest color on top gives the design the most definition, as you will see in the following pictures.
I decided that I would be stitching with the base layer up so that I could see my stitches, so I laid all the fabrics on top of each other in opposite order. Then secure them. If you have some of that sticky fabric spray, then that would work best. If not, use lots and lots of pins. You can use quilt-basting safety pins, but I prefer to use straight pins so that I can remove them easily. I also marked the quadrants of the cloth on the back to help me arrange my designs.
To make the spirals, I marked my center and then marked dots like so at 1/4 and 1/2 inches from the center. I recommend doing slightly wider channels than 1/4 inches--the channels were close to too small for cutting on curves. Straight channels would be a different story.
Then I connected the dots to give me my first several spirals.
Once you have your spiral going, you can just approximate your way around or use your presser foot at a guide.
I sewed this spiral until I ran off the edge.
I filled in the corner and expanded the spiral a bit before moving onto the second spiral.
Two spirals!
I filled in the rest of the spit-up cloth with little Vs following the curves of the two spirals.
All done with the sewing!
I love my Olfa chenille cutter, it makes cutting the channels so much easier! But you still have to be careful that you don't cut too close to the lines of stitching. I also had some channels that were too narrow for my cutter to get through, so I used my seam ripper.
Unfortunately, I had a few accidents in the cutting. To fix the gaps, I whip stitched the raw edges together...
Ironed a patch on using sewable fusible web...
And then stitched on each edge and the middle, following the stitching above, to secure the patch. Good as new!
Add the backing and binding before washing! Here's the front, ready to wash...
And the back! I love these colors.
Now the ripples....I decided to just do kind of organic, free form ripples. I had tried something more exact, but that didn't work out and I ended up having to tear out 6 lines of stitching, which was super annoying. I made this ripple cloth as a back-up in case the spiral one failed.
I sewed one initial line and then just kind of followed it the rest of the time. Sometimes I had to stray from the original line to make more ripples because it started smoothing out over time. I enjoyed how it felt kind of spontaneous. :)
This is the spiral one, freshly washed. If you click on the picture, it should get bigger. You will see that it's a bit shaggy. Those shaggy parts are where I failed to keep the spiral curved enough to stay on the bias. I ended up having to give it a hair cut. Then I washed it again and it got a little bit shaggy again, so it got a second hair cut. I'm pretty sure that it won't be too shaggy with subsequent washings...I hope. The ripple cloth had some very minor shagginess, but nothing that was a big deal.
Our little guy LOVED looking at the spirals--I may have to make one of these for him.
Sweet little hands.
Ripples! I like how the colors on this one turned out better. I just inverted the colors. The spiral cloth's colors are: light pink, dark pink, then orange; the ripple's colors are: orange, dark pink, then light pink.
And, finally, a fully shot because it drives me crazy when blog posts don't include a picture of the full project. :)
And there you go! Feel free to ask any questions!
~Regina
Tuesday, January 3, 2012
Flower Magnets!
I've become a bit obsessed with these flowers.
An online friend of mine shared how to make them on her blog: Aux Belles Chooses.
I've enjoyed mixing and matching fabrics...
And finding different ways to use them...
So cute and versatile!
~Regina
An online friend of mine shared how to make them on her blog: Aux Belles Chooses.
I've enjoyed mixing and matching fabrics...
And finding different ways to use them...
So cute and versatile!
~Regina
Saturday, May 14, 2011
Pretty Ironing Board Cover
I having been looking for a cute ironing board cover for a while. I finally took it upon myself to make one because I just couldn't find what I wanted. I took tips and ideas from two other ironing board cover tutorials. This one is more thorough and a bit more involved. This other is a bit more simple.
Materials:
-2 yds of fabric (for my 53 inch ironing board)
-5 yds twine or string
-coordinating thread
-typical sewing stuff
Ironing fabric--always a good way to start a project. (Note: I always pre-wash and dry my fabric, too.)
Then I laid out my fabric on my cutting board and laid my ironing board on top of it.
I measured the depth of my ironing board...
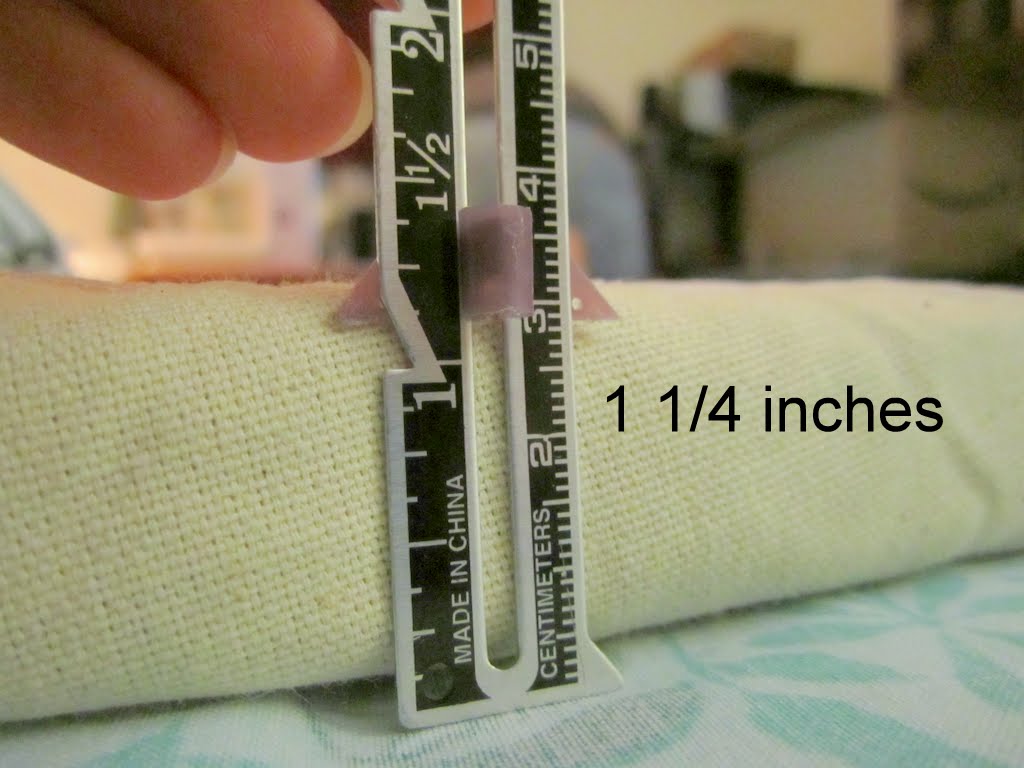
and decided how much of a hem and lip I needed to hold the cover securely. I added 1.5 inches.
And then cut it slightly larger (because I'm really bad about cutting things too small).
All cut out.
I turned it under 3/4 an inch, pinned it...
and then ironed the edge down. I found it easier to work with the curves with them nicely ironed.
After the initial ironing, I turned the raw edge of the fabric under to meet the fold and began to tuck the string into it. I pinned the hem closed to hold the string in. I believe this is much easier to do this way rather than trying to feed the string around an already-sewn channel.
All folded and strung! This is the "back end" of the cover (not the pointed end).
I marked the center (the vertical line) and measured the positions for the button holes so that they would be evenly spaced.
Button holes sewn! They aren't perfect, but they're going to be under the bottom of the ironing board anyways.
Cut them open (carefully!), threaded the string through them and pinned the channel to make sewing easy.
Then I used my zipper foot to run right along the string and close it in nice and securely.
Of course, I didn't think about which side the zipper foot would have to be on, so I faced all of the pin heads the wrong way! Oops!!
But otherwise, sewing the channel was super easy and I finished it quickly. I tied off the ends of the string to make them prettier.
Laid out the finished cover....
...and cinched it around my cover. It fit perfectly. I had to work some wrinkles out by moving the fabric along the cinched string, but eventually it all laid tight and smooth.
~Regina
Materials:
-2 yds of fabric (for my 53 inch ironing board)
-5 yds twine or string
-coordinating thread
-typical sewing stuff
Ironing fabric--always a good way to start a project. (Note: I always pre-wash and dry my fabric, too.)
Then I laid out my fabric on my cutting board and laid my ironing board on top of it.
I measured the depth of my ironing board...
and decided how much of a hem and lip I needed to hold the cover securely. I added 1.5 inches.
And then cut it slightly larger (because I'm really bad about cutting things too small).
All cut out.
I turned it under 3/4 an inch, pinned it...
and then ironed the edge down. I found it easier to work with the curves with them nicely ironed.
After the initial ironing, I turned the raw edge of the fabric under to meet the fold and began to tuck the string into it. I pinned the hem closed to hold the string in. I believe this is much easier to do this way rather than trying to feed the string around an already-sewn channel.
All folded and strung! This is the "back end" of the cover (not the pointed end).
I marked the center (the vertical line) and measured the positions for the button holes so that they would be evenly spaced.
Button holes sewn! They aren't perfect, but they're going to be under the bottom of the ironing board anyways.
Cut them open (carefully!), threaded the string through them and pinned the channel to make sewing easy.
Then I used my zipper foot to run right along the string and close it in nice and securely.
Of course, I didn't think about which side the zipper foot would have to be on, so I faced all of the pin heads the wrong way! Oops!!
But otherwise, sewing the channel was super easy and I finished it quickly. I tied off the ends of the string to make them prettier.
Laid out the finished cover....
...and cinched it around my cover. It fit perfectly. I had to work some wrinkles out by moving the fabric along the cinched string, but eventually it all laid tight and smooth.
I tied the strings into a bow and tucked them up under the backside of the cover. All done!
Now go make your ironing board pretty!~Regina
Subscribe to:
Posts (Atom)