Showing posts with label fleece. Show all posts

Thursday, November 17, 2011

Car Seat Cover!

With the cold weather coming, we need to keep our little people nice and warm!
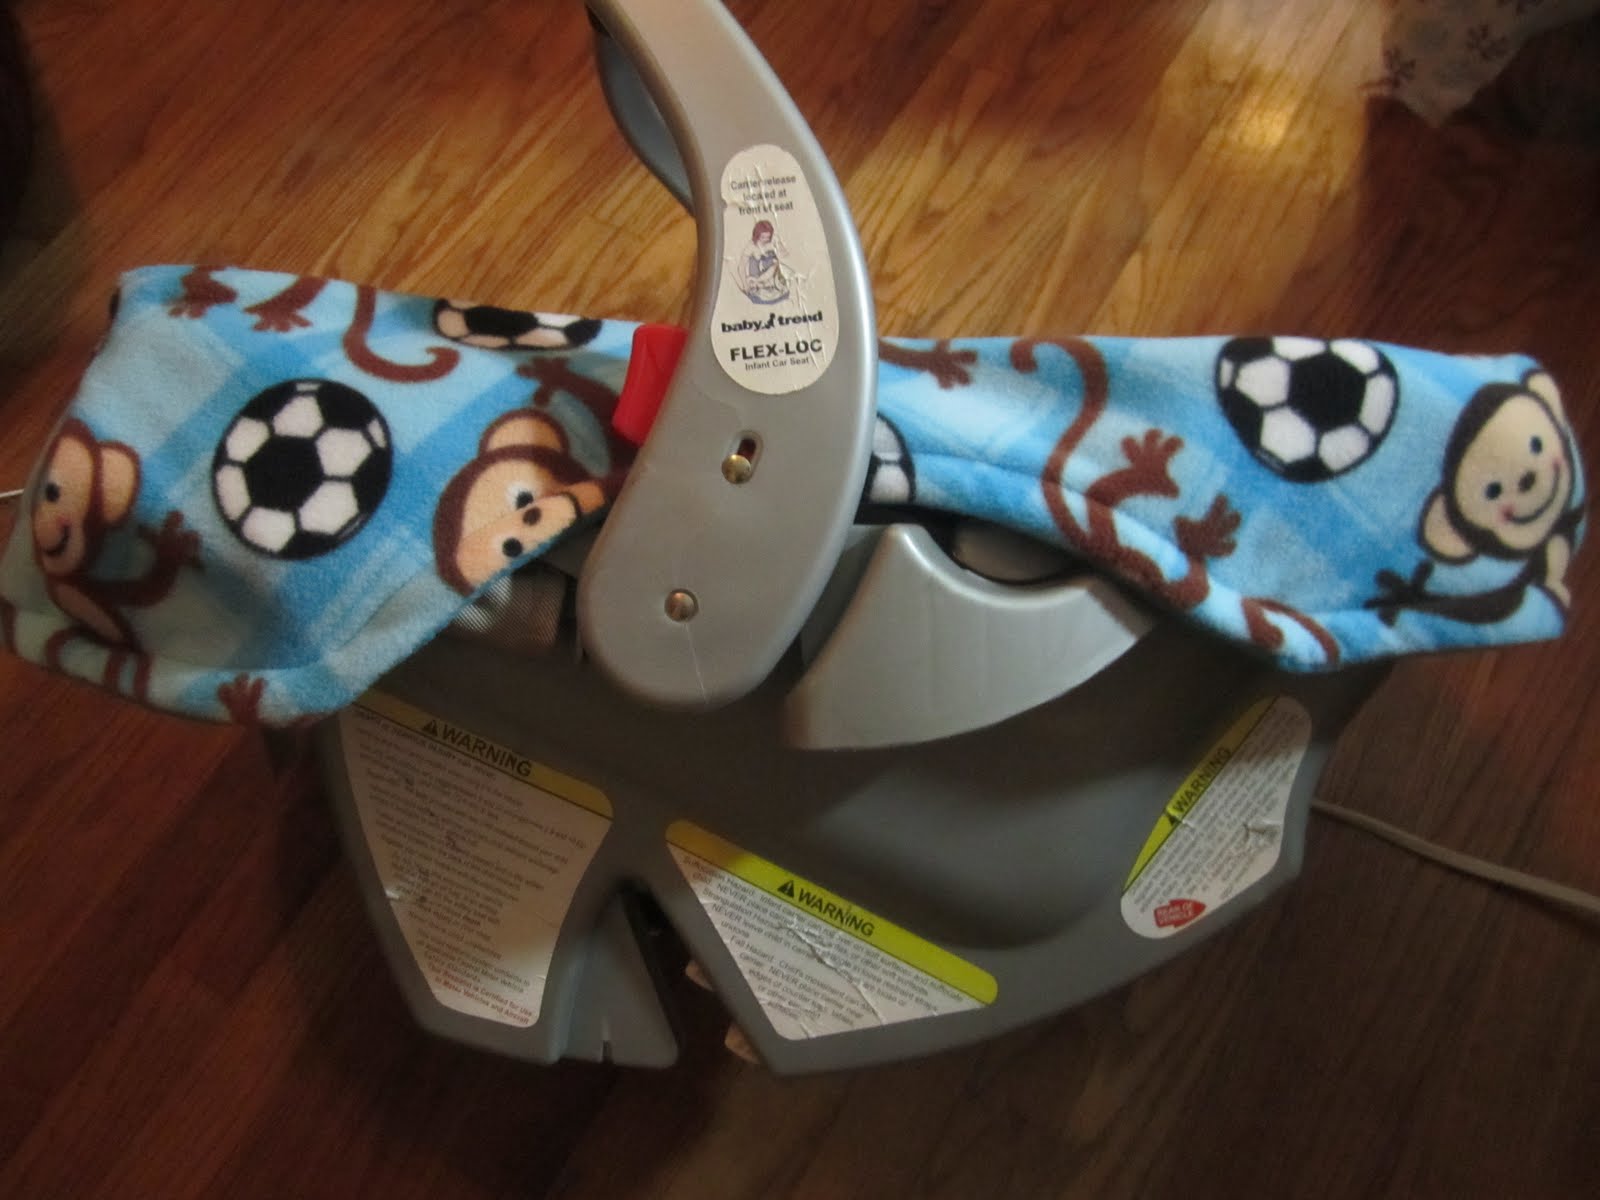
I decided to make a "shower cap" style car seat cover for our infant seat because I knew I could make it for less than the going price out there ($20-$30) and it would be a lot cuter. I had the solid fleece leftover from another project, I bought the monkey fleece from the remnant bin, and everything else I already had on hand. This project took me an afternoon and cost about $3.

***A note about car seat safety: this type of cover is considered safe and will not void your car seat's warranty in the event of an accident because it does not interfere with the straps or safety features of the seat. There are many car seat buntings that go under the child or that have you thread the straps through them. Those are not safe and if you use them, your child cannot be guaranteed to be safe in the event of a crash. Any extra padding can compress and allow too much slack in the straps (which are made to stretch up to 6 inches in a crash) so that the child could slip out. Anything interfering with the straps could prevent them from functioning correctly or stress them in the wrong way so that they break.***

OK, now that that's out of the way, onward! Just to warn you, this is more of a description of how I did this, rather than a tutorial. I couldn't figure out how to make it less confusing, but I think someone could take my ideas and modify them to make one themselves....

To help you visualize what we are making, all it is is a ring of fabric with a circle sewn onto it. I used about 1.5 yards of 60 inches wide fleece for the cover--or about 3/4 yard of outer fabric and 3/4 yard of lining fabric. I was kind of flying by the seat of my pants on this, so I didn't actually know I had enough until the very end. ;)

First, measure your car seat. Mine is 28 inches tall, 14 inches wide, and about 76 inches around. I played around a bit before figuring out that I preferred my long strip of fabric, which would make the ring that goes around the car seat to hold the cover on, to be about 8 inches wide. I added a bit of length and width and started cutting.

I seriously should have taken pictures of this part, but I didn't...feel free to ask questions in the comments so I can clear anything up...

I cut 4 strips of fabric 40 inches long by 9 inches wide (2 outer fabric, 2 inner fabric). I joined the matching fabrics into into 2 long strips of about 79 inches long and then sewed them all together (right sides together). So now you have your outer and lining fabric stitched into a long tube, right sides together.

Before turning the right side out, I wrapped them around the car seat, pinned it in place, and marked where the handles were so that I could contour the fabric a bit. I pinned along my markings and sewed along the line. Then I cut off the extra fabric and turned the entire tube right side out.

So now you have a shape something like this (pardon the mess, our toddler's play area has the best light): 
Of course, you can put your seam where ever you want to, but I wanted my last seam to be at a handle because I felt that it would hide any weirdness better. Here's a shot of how the tube/ring of fabric looks on the seat:
Once I liked how the curves fell, I top-stitched along all the edges, making sure to leave a 1/2-3/4 inch channel along the bottom edge, where we will thread our elastic shortly. Then I pinned my edges together and stitched the fabric strip into a ring, leaving the channel for the elastic open. (Make sense? Probably not...)

Next step: fitting the fabric to hug the top of the car seat. I arranged my fabric ring so that the contours lined up with the handles and grabbed some pins. I started folding the fabric at the corners this way and that until I liked how the fabric folded around the seat. I ended up doing just one fold at each corner, but looking back, I think the bottom of the seat (where the baby's feet go) could have used one more fold or pleat right in the middle.
Pinned folds. It looks kind of loose because it doesn't have elastic in the lower part of the tube yet.
Stitch down both edges (outer and inner) of the folds to make sure they don't flap around.

Now it's time for elastic! Find where you left the openings for the channel and cut your elastic. I cut mine at about 50 inches long. Thread it through using a big safety pin or one of those cool threading things that would be soooo nice to have for this project. :)
Once you're all the way through, safety pin the two ends together so that you can tighten it around the seat and stitch it later.
Put your fabric ring back on the seat and play with the elastic until you like its tightness.
Check everything, especially the contoured areas to make sure they fit nicely. Pin your elastic at your desired tightness
Once you're happy with it, you can stitch the elastic together and finish the seam that you left open. I ended up tightening my elastic up a good 8 inches. To finish the seam, I held the end of my channel together and stitched it (through the elastic), then I pushed the raw edges of the seam over to one side and stitched them down in a kind of half felled seam. (Once again, that probably doesn't make much sense...but I couldn't get a good picture of it, either.)
Now that you're done with the outer part of the cover, you can do the actual cover part! I laid my remaining fabric out on the seat, roughly cut it to the correct size, took it off and trimmed it some more, checked its size, trimmed it some more, etc. until I had the size I wanted. Mine ended up being 15 inches by 23 inches.
Stitch it right sides together, leaving a gap for turning. Turn right side out, check the size on the seat again before top stitching it! Once it's top stitched, position it on the car seat and pin it to the ring of fabric. I pinned mine about half way up the ring (up to even with the handle) so that I could get the child in and out of the car seat without removing the cover.

Now you stitch the top of the cover onto the ring of fabric. This takes a bit of maneuvering since you're fighting elastic, too.
Almost done! Now you just need a way to close the flap over the baby so that the cold wind stays out. I decided to use some velcro. You could use snaps or magnets or velcro all the way around the edge (unlike my few spots of velcro).
Whatever the case, secure your closures and put the baby in it!
It keeps the baby nice and comfy on those cold, windy days. I do have to pull up on corner of the cover to tighten and loosen the car seat straps, but otherwise the cover can stay on the seat all the time.

Now that you survived that uber-confusing explanation of how I made this thing, have fun trying it yourself! I recommend having a car seat right there with you while you are making it because there are so many styles and models of car seats. Unless you have the exact one I have, you're going to need to figure out the best measurements for your seat.

If you read all of that, congratulations! I hope you enjoyed it. :)

~Regina

Monday, December 13, 2010

Cloth Training Pants!

Just to warn you, this is one looooong tutorial.  I thought about breaking it up into two but it wasn't quite that long...

My almost two-year-old daughter decided that she no longer liked diapers and started refusing to wear them.  So we decided to gently introduce her to the idea of potty training.  To aid with that, I decided that she needed some training pants so that she could work on the concept of keeping her "panties" dry.  After much googling, I finally found this free pattern that I really liked.  It comes from the Nappy Network--DIY side of the site.  Here is the specific Wee Weka Knickers pattern in PDF format.  You can also get to the pattern by clicking on the Nappy Network link, scrolling down to the bottom of their page and finding their link that says "Wee Weka Pull-on training Knickers."

So, go print off the pattern, measure your kiddo to see how he or she compares to the pattern and modify the pattern accordingly.  For my daughter, I made four modifications:
1. I folded over the waist to make the elastic casing rather than sewing on a separate band--my daughter preferred a lower waist.
2. I cut the leg holes a little wider--she liked them to be looser.
3. I did not add cuffs around the leg holes--same reason as the above.
4. I added a small absorbent liner in the crotch area--my preference.

It took making 3 different panties to discover what my daughter liked. I highly recommend making one and modifying the pattern, making another one, modifying it, etc. until you find the right fit for your kiddo.  Here is my final pattern.  You can click on any of these pictures to see them larger.
I used fleece for the panties, but you can use any cloth that has a slight stretch.  Lay the dotted side of the pattern on the fold of your fabric and cut it out.  Make sure that your fabric's stretch runs across the pattern.  I tried to stretch (haha!) the fabric I got by cutting a few panties out with the stretch running the other way and my daughter refuses to wear those.  They just don't fit the same and seem to be too snug.  So don't be like me.
As you can see from the cutting board's measurements, each panty takes about a 15" by 11" piece of fabric.  It will take more if you are doing a separate waist band and leg cuffs.  To figure out the shape and size of the liner, I laid out my cut panty on a blank sheet of paper and traced the leg holes.  Then I rounded out the shape and cut it down a little so that it fit nicely inside the crotch area.
This is what I came up with: a little pad-shaped thing that is about 4" by 7".
I cut out a whole bunch of these from two old sweatshirts of my husband. I used two of these liners per diaper, but I could easily have done three for more absorbency.  I also made them fairly small, you could easily make them larger.
The liners are the first thing to get sewn in. Pin them...
And stitch them in!  I used my longest stitch and went around them twice.
I don't know if it really helps them be more secure or anything like that, but I really like how it looks from the outside of the panties.
Then I pinned up the sides and stitched them at 3/8ths inch seam allowance (rather than the 1/2 inch called for in the pattern). I wanted them to be a little looser than the original pattern's.
Also note that I used a straight stitch. Since I'm using fleece, it won't unravel, so I didn't need to zig-zag the edges.  If you are using a fabric that will unravel, make sure to zig-zag or serge the edges. Or you can do what I did with these to make them more pretty: a sort of half felled seam. 

This is a felled seam.  Basically, you stitch up the seam as normal, then cut one seam allowance shorter than the other, fold the longer one around the shorter and turn under the raw edge so that all raw edges are hidden. Then you stitch it all up.

What I did was stitch up my side seams as I just showed you and trimmed the back panel's seam allowance to be significantly shorter. Then I folded the front panel's seam allowance back over it, but I didn't fold the raw edge under.  I stitched it down just like that.  One raw edge is still showing and the other is hidden. I did this because I wanted the side seams to be a little more finished and flat so that they wouldn't bother my daughter's sensitive skin.  She's very sensitive to the way clothing rubs, so this flattened the potentially annoying seam so that she doesn't even notice it.  It also adds a nice finished touch to the panties.  Make sense?  Probably not, it was hard to catch with photos. Feel free to comment with questions!
Once I had the side seams all sewn up, I started on the waist band.  I simply folded the fabric over on itself about 1/2 inch and stitched it. I didn't do the separate waist band because I wanted the panties to be lower-cut.  But after using these for a while, I think that next time I make them, I will either add more height to the pattern when I cut them out or I will add the separate waist band like the original pattern tells us to do. These are cut just a bit too low. Or maybe my daughter grew since I made them, you never know!
I had the front of the waist band dip down a bit more to go under my daughter's little belly. I definitely like how this worked out.  Once they were all pinned, I stitched them up at 3/8ths inch.  Make sure to leave an unstitched hole in the waist band. This is where you'll thread your elastic!
So...your panties are basically all stitched up. This is what we have left to work with: panties, elastic and buttons.
Let's start with the buttons. I had 6 panties that my daughter needed to be able to tell front from back on. So I laid out my many colors of buttons and started choosing which ones to use.
I stitched them on with a zig-zag stitch, trimmed the thread, and dabbed fabric glue onto the threads to protect them from tiny hands that like to pull on threads.  Why did I do so many colors? Because I'm a glutton for punishment and love changing the thread out on my machine...just kidding. I just wanted lots of colors--nevermind that it was rather annoying to switch the colors out for the various buttons...
Then cut out your elastic.  I cut these at 14 inches for my daughter's 20-21 inch waist--they're a bit tight, so next time I'll cut them a bit looser.
Thread them through the waist band using a safety pin...
And stitch them!  I used a zig-zag stitch and went back and forth over them several times. I took the needle you see there out before I really started stitching. It was there to keep the overlap in place until I could get it under my presser foot.
My lovely elastic stitching job....
Stitch up the hole in the waist band and you're done!
I keep mine stacked in a convenient spot in our living room--right next to the cloth diapers/spit-up cloths that are used to clean up accidents.
And here's my little one (well, part of her) modeling her panties.  So cute!

There you go: how I modified a pattern to make my own cloth training pants.  Our potty training kind of isn't going anywhere, but hopefully yours will move along much better than ours!  My little girl seems to think her panties are cloth diapers and prefers them over our typical disposables.  I comfort myself with the fact that we're saving money on the disposables.... ;)

Feel free to leave a comment if you have any questions! The comments are moderated so I will see the questions no matter how long ago I posted this.

~Regina