Showing posts with label color. Show all posts

Wednesday, February 29, 2012

Visual Daily Routine from Paint Cards

First, before anything else, if you didn't know this already, I entered a "Creative Bloggers Got Talent" contest over at Every Creative Endevor. The second round of voting has started, so head over there and VOTE! One of the projects is mine, but I can't tell you which one. :) Have fun!

Now back to our regularly-scheduled programming. ;)

Several months ago, I saw a daily rhythm chart in a giveaway on one of my favorite idea websites and thought "I could make one of those!" I at first thought I wanted to do felt (and that would still be cute), but I wanted to do something fairly simple since I don't have a lot of time on my hands during the week. While I was walking past the paint cards at Lowes a few weeks ago, inspiration hit!
A refrigerator daily rhythm chart, complete with pictures of our sweet kiddos!
I grabbed a TON of paint cards, some from each set of color, and cut them up.
 Then I laminated them--the laminator was our big family Christmas present!-- and cut them out.
 I used one of these little edge-cutters to round the sharp edges, but it took some babying.
 I cut some small sections of adhesive magnet...
 And stuck them on each color!
 First stage is done! That's a whole lotta cards!
Next, I printed out a bunch of pictures of the kiddos doing our daily things...
 Cut them out so that only the thing we are supposed to do is showing....
 And laminated them!
 After cutting them out, I added magnets to the back of each one.
 Finally, I wrote each daily activity on a card and matched them up with the pictures. I did some color organization: orange is food-related, green is self-care related, blue is playtime related, and purple is sleep related. There are a few pictures (like waking up and storytime) that didn't fit into those categories, so they got their own colors. I kept everything focused on activities and didn't worry about the time that we do them, only the order, since our 3 year old hasn't learned time-keeping yet (and I'm not planning to teach it soon).


 I still had a ton of cards left, so I decided to try something else. I took 10 of the more brilliant colors and arranged them in rainbow order. Then I wrote a number and added the corresponding number of dots on each one. These are now on the back of our daughter's easel (an Ikea one modded to be magnetic on the "chalkboard" side).
 And I still have 28 more! I temporarily felt like I MUST do something with them right away, but then I realized that it is OK for me to store them away for more inspiration. :)


~Regina

Thursday, February 16, 2012

Colored Ice Blocks

Up for some winter fun? If the weather outside is hanging out below freezing, then this something for you and your kiddos!
This is a seriously simple project, but it's lots of fun. Our 3 year old daughter had fun "helping" me.

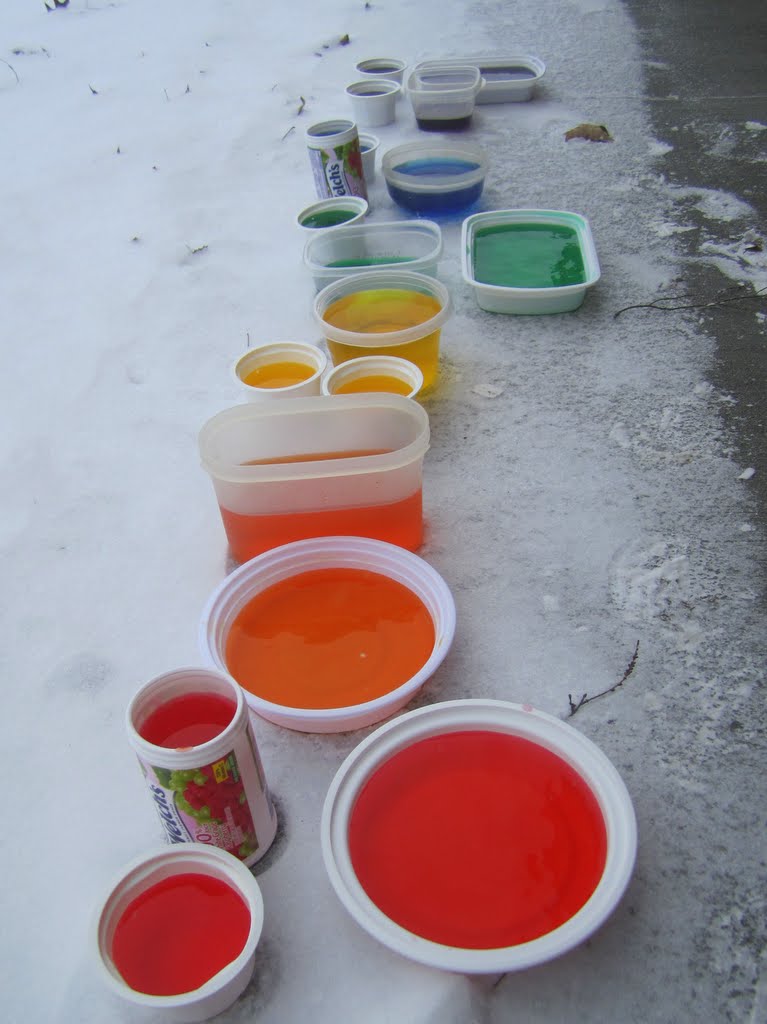
I did about 4 cups of each color. I just used regular liquid food coloring and added color until I liked how it looked. Liquid watercolors would probably work really well, also.
We poured the colors into all sorts of containers for freezing. Make sure to use containers that are wider at the top than at the bottom so that the blocks pop out nicely. I made the mistake of using cleaned juice "cans" and couldn't get the blocks out for 2 days! Oops.
An excited little girl.
Pretty colors! I did two mini-muffins of each color. I found that the purple turned kind of black as it froze, but the other colors worked out great.
We lined them all up outside and left them for 2 days.
Frozen! See how the purple (in the upper right corner) has turned blackish?
We timed our ice blocks really well. We had two really cold days to get them nice and solid, then the third day was a bit warmer so that the blocks came out a bit more easily.
I even bundled up our little guy to come watch. Sunlight is good for all of us!
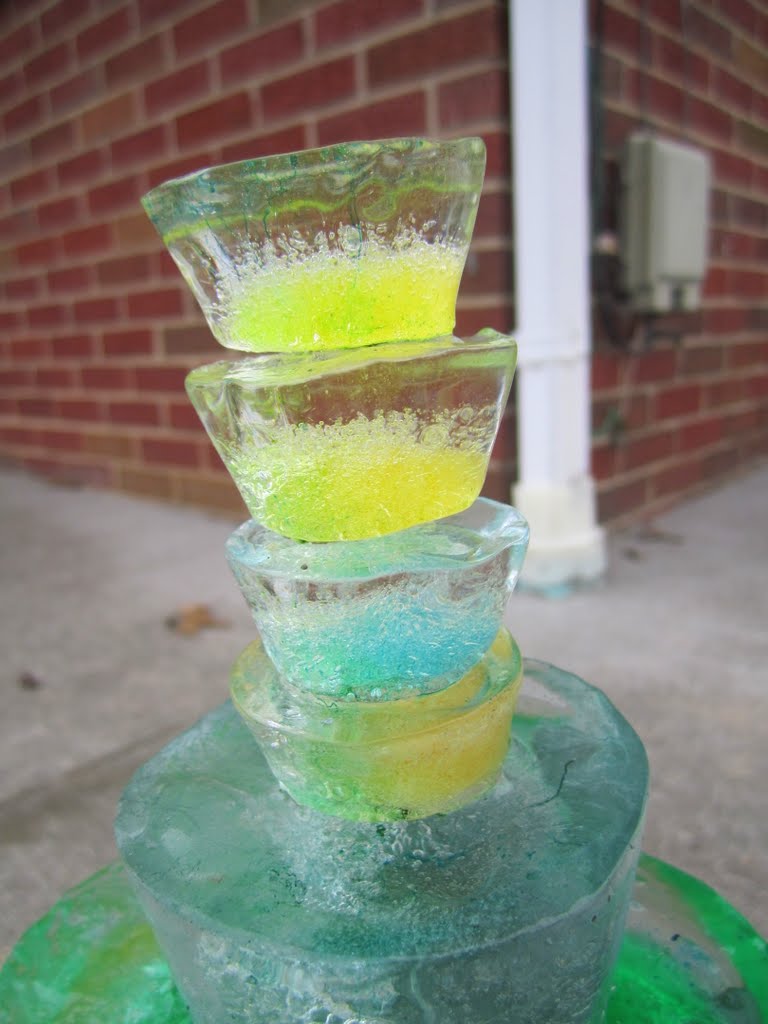
Stacking...
Building...
So many possibilities!

Our daughter insisted that this is a parking garage (what??!) but it looks like an ice castle to me. :)
Twenty-four hours later, this is what our ice castle looked like.
I love how the color ended up concentrated in one area.

The castle stuck around for 2 to 2 and a half days before completely melting away. If your weather stayed colder, then that wouldn't be an issue. Just make sure to build it somewhere where it won't be in the way all winter!

Happy building!

~Regina

Thursday, November 3, 2011

Fall Leaf Stained Glass

A fun project to do with a little person!

We went out on a walk and collected a bunch of pretty leaves. Then we ironed the leaves between pieces of wax paper (iron on high, no steam--make sure to cover the wax paper with cloth on both sides!). Once the leaves were nice, flat, and dry, we were ready to use them.

I laid out a nice sheet of clear contact paper, sticky side up, and taped the edges down with painters' tape. We laid the leaves out on it.
Then we took off the painters' tape, stuck the contact paper to the window, smoothed it out and we were done!
Our little girl was so proud of herself!
The leaves look gorgeous when the rising sun shines right onto them.
I did end up cutting off some of the contact paper with an X-acto knife to form a more rounded outline of the leaf sheet because the straight edge was very stark.

~Regina

Monday, November 15, 2010

Colorful Pound Cake!

Now, for a change of pace: pound cake! With food coloring! :)

Pound Cake
I'm not completely sure where this recipe came from, probably my mom. :)

1 cup butter
1/2 cup vegetable shortening
3 cups sugar
5 eggs
1/2 teaspoon fine salt
1/2 teaspoon baking powder
1 cup milk
3 cups flour
1 teaspoon vanilla
Food coloring

Prep time: 30-45 minutes
Bake time: 90 minutes (1 1/2 hours)
Oven: 350 degrees F
Yield: 1 tube or bundt pan

Preheat your oven to 350 degrees F.

Cream softened butter and shortening together. Add sugar, a little at a time, until well combined.  Add eggs, one at a time, beating after each addition.  Stir dry ingredients together in another bowl and add to mixer alternately with milk, starting with the flour and ending with the flour. Once well combined, mix in the vanilla. 
So, now you have this:

And this:
 I got the idea to color  my cake from here, who got it from elsewhere. Rainbow cakes and cupcakes have been floating around the internet for a while.  Anyways....I divided my batter as equally as I could into three bowls (please pardon my computer in the background, I was keeping track of something important while baking).

Choose your colors and squeeze (or drip) the coloring onto your batter. You will likely use quite a bit of coloring if you want vivid colors.  I wanted red, orange, and yellow to celebrate the arrival of Autumn.
 In process...
 All done!  I ran out of the red and yellow coloring, so I couldn't make the batter any more vivid, which was fine.

Pour one color at a time into your greased and floured pan (confession: I only greased mine). Red:
 Try to pour them evenly because you don't want to have to spread them much. The colors will swirl together and begin to mix if you try.  Of course, you might want this effect and it would probably be pretty cool.  Orange:

And my last layer, yellow:

Pop it into your preheated oven (350 degrees F) and watch it bake.  I thought it was very interesting how the lowest layer (red) actually rose up the edges because of how the batter was poured onto it.

 So, once a toothpick inserted into the middle of the ring of cake come out clean, the cake should be done.  My cake usually has to bake 1 hour and 15 minutes, but thanks to my oven, the "top" (whatever is closest to the roof of the oven) is always over-done. I did pretty well with keeping this cake from burning, but if you look closely, you'll see some burned edges.

Holding the pan with hot pads, flip it over onto a cooling rack and let the cake fall out of the pan.  It should come out easily, but if it doesn't, don't force it. Just let the pan sit upside down on the rack while the cake cools.  It should come out easily eventually. If it doesn't, then you definitely didn't grease the pan well enough and, well, have fun getting the stuck cake out! ;)

Once it's cooled, slice and enjoy!  Of course, you don't have to wait for it to fully cool, but it is recommended.  Not that I ever listen to that particular recommendation when it comes to pound cake....
Mmmmm!

~Regina

Note: Of course, you don't have to put food coloring into the cake, you can just make it plain and it's just as wonderful that way.  But I like to brighten things up every once in a while. :)