While browsing through projects on Oneprettything.com, I found this adorable baby sock advent calendar and decided that I was going to make it. Well, something very like it. We have tons of out-grown baby socks floating around the house, so I decided to put them to a new use.
First, I soaked them in diluted bleach to soften their colors. I rinsed them thoroughly to make sure I got out all of the bleach, then proceeded with the rest of my project.
Yep, I picked up "scarlet" and "kelly green" Rit dyes to try out. I've never dyed fabric before, so this was a fun project. I decided to try making some stripes by wrapping some of the socks with rubber bands since the socks were kind of boring.
Then I weighed how much dye was in each package and halved it since I was only doing 13 socks in each color. The packages said they could work for 3 pounds of fabric and I didn't even have a pound.
I covered my work area since I didn't really want to dye our rental apartment's counter...
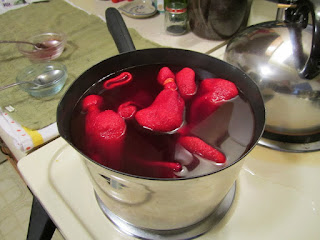
I decided since I wanted very rich colors, I was going to halve the amount of water called for (relative to the amount of dye I was using) and try the boiling dye method. So I ended up with 1/4 of the amount of water called for (per color) and 1/2 the amount of dye. Then I added salt into my pots (one of the Tips for Success on the Rit website) to help the color take to the fibers. Mix it well!
The instructions tell you to dissolve the dye in hot water and mix it well--then pour it into your pots.
Look at that lovely color! I was doing the green at the same time, I just found that the pictures of the red turned out better.
Pour it into your pot, mix it in, and add your fabric! (Note: I may be missing a step here, make sure to follow the directions on your dye package!)
Bring your water up to a simmer and keep the fabric moving constantly. This was a very time-intensive, labor-intensive project. I was hot and sweaty and very tired of the socks by the time I felt they had soaked long enough.
After about 25 minutes, I pulled out a sock to test it.
Rinse, rinse, rinse! Start with hot water and slowly work your way down to cooler water--this helps set the dye. You want to make sure that the water runs clear, that's how you know you're done.
I like the color!
So time to pull out all the others! I spooned the socks out rather than pouring the full pot of dye out because I wanted to make sure I still had some dye in case some of the socks didn't take the dye as well as others.
The sock laying on top is the one I've already rinsed. See the color difference between it and the socks that have yet to be rinsed?
I rinsed all the socks together, slowly working down to cold water. Then I pulled the rubber bands off the socks that had them. These didn't turn out too badly! They look kind of like soccer socks, but oh well. :)
These however were a no-go. Awful! I put them back into the dye to soak some more. No tie-dye for us!!
Ewww! The double stripes didn't work either! Back into the pot with you!!
Finally, I got all of the socks sufficiently dyed and rinsed and took a break!
Off to wash them (in cold water) and dry them for the next part of this project!
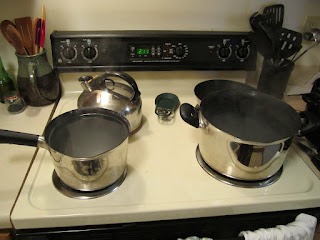
Oh, but wait! A word about my pots...I was really scared to use my non-stick pots for this project and almost didn't. But my wonderful husband insisted that it would be OK, so I did. They worked just fine and have no residual dye stuck in them. I made sure to refill them with very hot water and sprinkle some baking soda into that water and let them soak until cool, just to make sure that all the dye particles were sucked out of them. Then I just washed them as normal. It's been several weeks since dying the socks and I haven't given it a moment's thought when using the pots. No problems at all!
Part two is right here!
~Regina


No comments:
Post a Comment