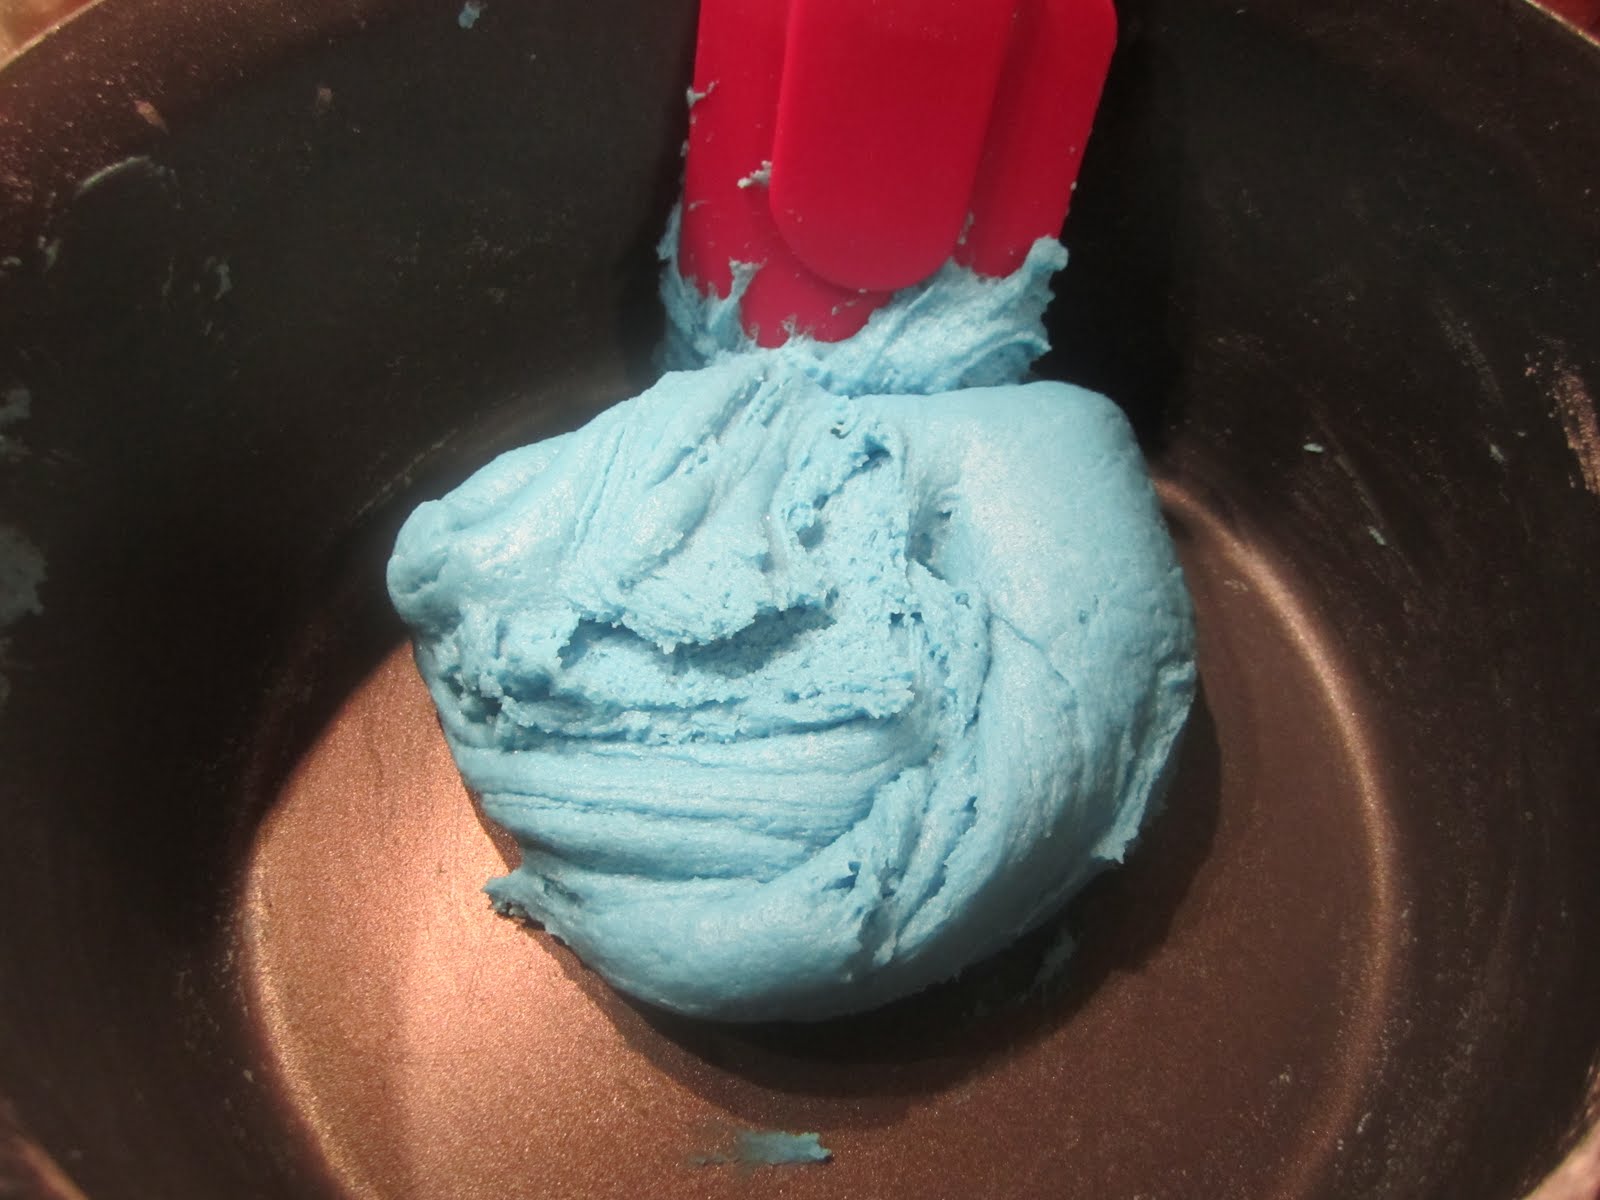
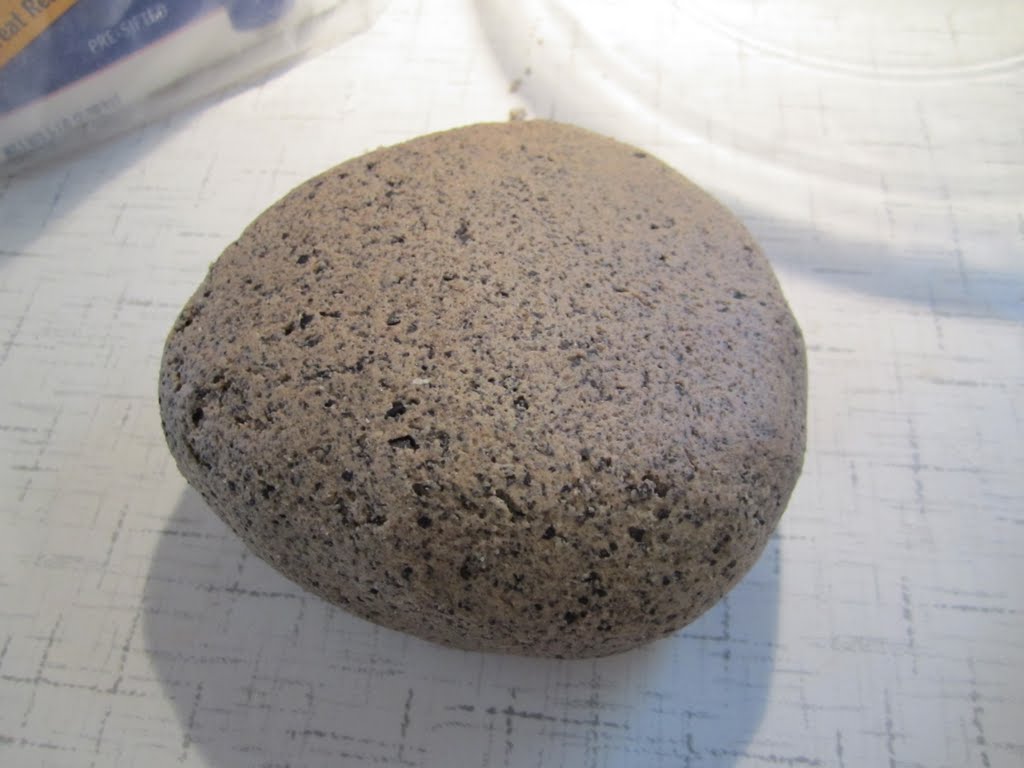
Most homemade play-dough recipes are variations on this most basic one.
Salt Play-Dough
Ingredients:
1 cup of salt
1 cup of water
2 cups of flour
1 tablespoon of cooking oil
Mix the salt, flour, oil, & water together.
My addition: it was too thin to just play with, it needed to be cooked over medium heat for 2-3 minutes (or until it comes together in a soft, but not sticky, ball).
Initial impressions:
-Very basic
-Didn't become smooth even after kneading for many minutes
-Leaves a light residue, but wipes up easily
-Easy to make
-Sticks to fingertips something awful (maybe it needed to be cooked a bit longer)
2 weeks later:
I'm going to guess that I put it in the bag before it was completely cooled, otherwise I have no idea why this dough turned into a puddle of goo! I know this isn't what this type of dough normally does... so strange.
~Regina
Other posts in the play-dough experiment series:
Kool-Aid Play-Dough
Traditional (Baking Soda) Play-Dough
Coffee Play-Dough
Gingerbread Play-Dough
Showing posts with label experiment. Show all posts
Thursday, December 15, 2011
Saturday, December 10, 2011
The Grand Play-Dough Experiment: Gingerbread Play-Dough
Gingerbread Play dough
1 C. flour
½ C. salt
2 tsp. Cream of tartar
1 C. water
1 tsp. Vegetable oil
lots of cinnamon, allspice, ginger, nutmeg, whatever!
(This play dough is simply a slight variation of a standard salt dough.)
Mix the dry ingredients. Play with the spices until you get the scent and color you want. Mix water and oil together first and THEN add them to the dry ingredients and stir.
In a pot, cook the mixture for two to three minutes, stirring frequently. The dough will start to pull away from the sides of the pan and clump together.
Take the dough out of the pan and knead the dough until it becomes soft and smooth. Allow to cool and store in an air-tight container.
Initial impressions:
-Easy to make
-Good for having a little helper
-Feels like a standard salt dough
-Needs lots of kneading to feel smooth
-Smells amazing!
-Leaves your hands smelling great!
-Leaves a small amount of easily wiped residue.
2 weeks later:
-Firm and moist
-A rubbery, elastic feel when molded
-Only a very slight graininess from the salt
-Very smooth for a salt dough
-Still smells great
-Leaves a light residue on the play area and hands
~Regina
Other posts in the play-dough experiment series:
Kool-Aid Play-Dough
Traditional (Baking Soda) Play-Dough
Coffee Play-Dough
1 C. flour
½ C. salt
2 tsp. Cream of tartar
1 C. water
1 tsp. Vegetable oil
lots of cinnamon, allspice, ginger, nutmeg, whatever!
(This play dough is simply a slight variation of a standard salt dough.)
Mix the dry ingredients. Play with the spices until you get the scent and color you want. Mix water and oil together first and THEN add them to the dry ingredients and stir.
In a pot, cook the mixture for two to three minutes, stirring frequently. The dough will start to pull away from the sides of the pan and clump together.
Take the dough out of the pan and knead the dough until it becomes soft and smooth. Allow to cool and store in an air-tight container.
Initial impressions:
-Easy to make
-Good for having a little helper
-Feels like a standard salt dough
-Needs lots of kneading to feel smooth
-Smells amazing!
-Leaves your hands smelling great!
-Leaves a small amount of easily wiped residue.
2 weeks later:
-Firm and moist
-A rubbery, elastic feel when molded
-Only a very slight graininess from the salt
-Very smooth for a salt dough
-Still smells great
-Leaves a light residue on the play area and hands
~Regina
Other posts in the play-dough experiment series:
Kool-Aid Play-Dough
Traditional (Baking Soda) Play-Dough
Coffee Play-Dough
Thursday, July 7, 2011
The Grand Play-Dough Experiment: Coffee Play-Dough
Coffee Play-Dough
1 cup flour
1/2 cup salt
1 cup used coffee grounds
1/2 cup cool coffee (more or less depending on how wet/dry the grounds are)
Mix all ingredients thoroughly. Knead until an evenly combined ball. Store in a zip-lock bag after play.
My ingredients.
Mixing the dries.
Adding the coffee.
Kneading and checking out the texture.
Lots of residue!
Initial impressions:
-odd texture for play-dough (but I believe that's the point)
-doesn't have a particularly strong coffee smell (may depend upon the grounds)
-leaves a significant residue on the hands, but not on the play surface
-nice that it's an uncooked recipe (so you can include littles in making it)
-easy to make
Our little girl loved rolling it out.
But wasn't thrilled about touching it.
Cookie cutters didn't work very well.
After a bit of storage and play:
-My daughter doesn't like the texture, so she had me touch it when she wanted to move it or something like that. She did enjoy rolling it out, though!
-Very, very wet after storage! We had to add a lot more flour to make it playable.
-Didn't do cookie cutters well.
-Left residue on hands and play area.
Final verdict: won't be making it again. Some kids and people might love the texture, but we certainly didn't. Plus, it was messy.
~Regina
Other posts in the Play-dough experiment series:
Kool-Aid Play-Dough
Traditional (Baking Soda) Play-Dough
Gingerbread Play-Dough
Labels:
coffee,
dough,
experiment,
grounds,
play,
play dough,
play-doh,
play-dough,
texture
Tuesday, June 21, 2011
No 'Poo!
No, this doesn't have anything to do with dirty diapers or poo--or stinky poo as we call it at our house. "No 'poo" refers to cleansing your hair without soap or shampoo. There are about a million different methods that fall under the the "no 'poo" definition--probably because there are so many different hair types!
Now, why in the world would I ever want to stop using shampoo and conditioner? Some people do it for environmental reasons, others because of sensitive scalps or to save money or because nothing seems to work quite right for their hair or just for fun. For me, nothing seems to work quite right for my very fine, thin, stick-straight and generally oily hair. And I think I can save us some money, though the savings aren't much when a $6 bottle of Ganier Frutis lasts for 2-3 months. My thin hair doesn't need much shampoo or conditioner to be clean.
However, I decided that since all conditioners seem to weigh down my very fine hair and shampoos tend to over-dry it, I wanted to try something more natural. Back in January or so I decided that once my bottle of shampoo/conditioner 2-in-1 ran out, I would be switching to baking soda and vinegar to clean my hair.
To be honest, I didn't do a lot of internet research on this switch. I have several online friends who use a couple different methods of no 'poo, so I mostly just talked to them about it. Becky at South of Sunnybrook was especially helpful. :) The method that enchanted me the most, if that's really the right word to use, was the one that uses baking soda and vinegar rinses. Why? I don't know, maybe because I think baking soda and vinegar are some of the most wonderful cleaning products in the world and every household should have a nice stock of them. :)
So, the fateful last squirt of my shampoo came on May 10th. I knew it was coming and had prepared myself by talking with my friends to know what to expect and to figure out what to start with. The two things I heard the most were: 1) this takes some experimenting to get it right for your hair and 2) it will take a while for your hair to adjust to not being cleaned by soap--be ready for your hair to look nasty for a few weeks. Here follows my log of this experiment.
Week 1 (May 11-17):
Day 1--I decided to start with a routine that involves me massaging about a tablespoon of dry baking soda into my dry scalp, rinsing it out, and then rinsing it with a mixture of 1 tablespoon apple cider vinegar mixed with 1 cup of water. Hair looks and feels great! Vinegar smell only sticks around for as long as my hair is wet.
Day 2-- Hair is a bit greasy but not bad.
Day 3-- Hair pretty greasy, which is totally expected. Hope it doesn't look this bad for church on Sunday... It was really hard to get the baking soda down to my scalp, it wanted to stick to my hair. Gross.
Day 4-- Re-read some info a friend sent me. She mixes her 1 tablespoon of baking soda into 1 cup of water (and then does the same vinegar rinse I'm doing). That sounds a lot easier than getting dry baking soda into my greasy hair. Tried that. Hair immediately felt much, much cleaner. I still massaged my scalp (which is good for your hair follicles) and followed the rest of my routine. When dried, my hair looks amazing--no grease, just nice shine. I think I will keep this change for now.
Day 5-- Hair looks great again after washing.
Day 6-- Decided to try cleaning my hair every other day. Today was a no-wash day and my hair looks gross and greasy.
Day 7-- Hair looks great again after cleaning.
Week 2 (May 18-24)
Day 8-- No-wash day again. Hair looks gross. I'm going to try to keep this up for a while to see if my hair adjusts, but I don't enjoy the gross hair days.
Day 12-- Another no-wash day. My hair is definitely adjusting to this new pattern. It still looks greasy at the roots and not quite as clean as on wash days, but it's not embarrassing to go out and about in it. It doesn't hold styling as well (I only dry if I have to and curl with an iron on its lowest setting--nothing more), but enough to look fine.
Week 3 (May 25-31)
Day 18-- I had an epiphany earlier this week. I realized that if I'm not washing my hair every day, that I don't have to take a shower in the morning anymore! This saves me a ton of time in the mornings with my little toddler running around, bent on creating havoc. So I've switched my showers to the evenings. This is working great, though I still need to wet my hair to actually fix it decently in the morning. Towards the end of the 2nd day, my hair still looks rather gross to me. Most people wouldn't think twice about it at this point, but I know it doesn't look as nice as it does when it's only 24 or 36 hours since being washed. BUT it does seem to be adjusting to this routine, so I'm going to keep going with it.
Week 5 (June 8-14)
I wasn't thrilled with the no-wash days. My hair looked great at 24 hours post-wash, but definitely needed to be washed between 36 and 40 hours post-wash. By 48 hours (time for another wash!), it looked awful. That just wasn't working for me, so I switched things up again. I am back to washing my hair every day (it is summer, after all!), but only with half the concentration of baking soda and vinegar. So I was doing 1 tablespoon of baking soda per 8 oz. of water; now I'm doing a half tablespoon (more like a heaping teaspoon) of baking soda per 8 oz of water. The same goes for the vinegar. Seems to be working fine so far.
Week 7 (June 21-27)
I'm liking how this current hair routine is working out. The 1/2 tablespoon of baking soda and vinegar to 8 oz of water seems just about right for summertime. My hair still looks pretty good when it's time for the next wash so I could probably decrease the concentration of the baking soda and vinegar a bit more, but I think I'll just be sticking with this for a while. I imagine that when cooler, drier weather comes, I may need to re-adjust my routine but we will see when that time comes.
A couple notes:
-One thing I've found strange about this switch is how my hair acts when it's being styled with a curling iron (which happens 2-3 times a week). It still kind of bothers me when I curl it and it holds the curl while looking kind of, well, greasy. But then I just shake my head to help separate and settle the hairs and it looks fine. I'm guessing that I'm seeing that now that my hair is not being stripped of its natural oils.
-My husband says that my hair feels the best that it's ever felt (we've been married just over 3 yrs) and I think I agree. My hair looks nice and healthy to me, which makes me feel good about it. :) We'll see what happens when our baby is born since hormonal changes can have significant impact on how hair acts.
-I'm done with this for now, though I will probably update it later this year if I have to make any significant changes to my hair washing routine after the baby comes or with the weather change. Hope that others find this useful--or just fun to read. :)
Postpartum update: I did find that I needed to increase the amount of baking soda I used from 1/2 a tablespoon to a full tablespoon for 8 oz. of water. Apparently my non-pregnant hormones make me more greasy. That was the only change.
-It's now been almost 2 years since I switched to cleaning my hair with baking soda and vinegar and I see no reason to ever go back to shampoo. I'm very happy with this method and my hair looks better and acts healthier than it ever did before.
~Regina
Now, why in the world would I ever want to stop using shampoo and conditioner? Some people do it for environmental reasons, others because of sensitive scalps or to save money or because nothing seems to work quite right for their hair or just for fun. For me, nothing seems to work quite right for my very fine, thin, stick-straight and generally oily hair. And I think I can save us some money, though the savings aren't much when a $6 bottle of Ganier Frutis lasts for 2-3 months. My thin hair doesn't need much shampoo or conditioner to be clean.
However, I decided that since all conditioners seem to weigh down my very fine hair and shampoos tend to over-dry it, I wanted to try something more natural. Back in January or so I decided that once my bottle of shampoo/conditioner 2-in-1 ran out, I would be switching to baking soda and vinegar to clean my hair.
To be honest, I didn't do a lot of internet research on this switch. I have several online friends who use a couple different methods of no 'poo, so I mostly just talked to them about it. Becky at South of Sunnybrook was especially helpful. :) The method that enchanted me the most, if that's really the right word to use, was the one that uses baking soda and vinegar rinses. Why? I don't know, maybe because I think baking soda and vinegar are some of the most wonderful cleaning products in the world and every household should have a nice stock of them. :)
So, the fateful last squirt of my shampoo came on May 10th. I knew it was coming and had prepared myself by talking with my friends to know what to expect and to figure out what to start with. The two things I heard the most were: 1) this takes some experimenting to get it right for your hair and 2) it will take a while for your hair to adjust to not being cleaned by soap--be ready for your hair to look nasty for a few weeks. Here follows my log of this experiment.
Week 1 (May 11-17):
Day 1--I decided to start with a routine that involves me massaging about a tablespoon of dry baking soda into my dry scalp, rinsing it out, and then rinsing it with a mixture of 1 tablespoon apple cider vinegar mixed with 1 cup of water. Hair looks and feels great! Vinegar smell only sticks around for as long as my hair is wet.
Day 2-- Hair is a bit greasy but not bad.
Day 3-- Hair pretty greasy, which is totally expected. Hope it doesn't look this bad for church on Sunday... It was really hard to get the baking soda down to my scalp, it wanted to stick to my hair. Gross.
Day 4-- Re-read some info a friend sent me. She mixes her 1 tablespoon of baking soda into 1 cup of water (and then does the same vinegar rinse I'm doing). That sounds a lot easier than getting dry baking soda into my greasy hair. Tried that. Hair immediately felt much, much cleaner. I still massaged my scalp (which is good for your hair follicles) and followed the rest of my routine. When dried, my hair looks amazing--no grease, just nice shine. I think I will keep this change for now.
Day 5-- Hair looks great again after washing.
Day 6-- Decided to try cleaning my hair every other day. Today was a no-wash day and my hair looks gross and greasy.
Day 7-- Hair looks great again after cleaning.
Week 2 (May 18-24)
Day 8-- No-wash day again. Hair looks gross. I'm going to try to keep this up for a while to see if my hair adjusts, but I don't enjoy the gross hair days.
Day 12-- Another no-wash day. My hair is definitely adjusting to this new pattern. It still looks greasy at the roots and not quite as clean as on wash days, but it's not embarrassing to go out and about in it. It doesn't hold styling as well (I only dry if I have to and curl with an iron on its lowest setting--nothing more), but enough to look fine.
Week 3 (May 25-31)
Day 18-- I had an epiphany earlier this week. I realized that if I'm not washing my hair every day, that I don't have to take a shower in the morning anymore! This saves me a ton of time in the mornings with my little toddler running around, bent on creating havoc. So I've switched my showers to the evenings. This is working great, though I still need to wet my hair to actually fix it decently in the morning. Towards the end of the 2nd day, my hair still looks rather gross to me. Most people wouldn't think twice about it at this point, but I know it doesn't look as nice as it does when it's only 24 or 36 hours since being washed. BUT it does seem to be adjusting to this routine, so I'm going to keep going with it.
Week 5 (June 8-14)
I wasn't thrilled with the no-wash days. My hair looked great at 24 hours post-wash, but definitely needed to be washed between 36 and 40 hours post-wash. By 48 hours (time for another wash!), it looked awful. That just wasn't working for me, so I switched things up again. I am back to washing my hair every day (it is summer, after all!), but only with half the concentration of baking soda and vinegar. So I was doing 1 tablespoon of baking soda per 8 oz. of water; now I'm doing a half tablespoon (more like a heaping teaspoon) of baking soda per 8 oz of water. The same goes for the vinegar. Seems to be working fine so far.
Week 7 (June 21-27)
I'm liking how this current hair routine is working out. The 1/2 tablespoon of baking soda and vinegar to 8 oz of water seems just about right for summertime. My hair still looks pretty good when it's time for the next wash so I could probably decrease the concentration of the baking soda and vinegar a bit more, but I think I'll just be sticking with this for a while. I imagine that when cooler, drier weather comes, I may need to re-adjust my routine but we will see when that time comes.
A couple notes:
-One thing I've found strange about this switch is how my hair acts when it's being styled with a curling iron (which happens 2-3 times a week). It still kind of bothers me when I curl it and it holds the curl while looking kind of, well, greasy. But then I just shake my head to help separate and settle the hairs and it looks fine. I'm guessing that I'm seeing that now that my hair is not being stripped of its natural oils.
-My husband says that my hair feels the best that it's ever felt (we've been married just over 3 yrs) and I think I agree. My hair looks nice and healthy to me, which makes me feel good about it. :) We'll see what happens when our baby is born since hormonal changes can have significant impact on how hair acts.
-I'm done with this for now, though I will probably update it later this year if I have to make any significant changes to my hair washing routine after the baby comes or with the weather change. Hope that others find this useful--or just fun to read. :)
Postpartum update: I did find that I needed to increase the amount of baking soda I used from 1/2 a tablespoon to a full tablespoon for 8 oz. of water. Apparently my non-pregnant hormones make me more greasy. That was the only change.
-It's now been almost 2 years since I switched to cleaning my hair with baking soda and vinegar and I see no reason to ever go back to shampoo. I'm very happy with this method and my hair looks better and acts healthier than it ever did before.
~Regina
Labels:
baking soda,
clean,
experiment,
hair,
log,
natural,
no 'poo,
shampoo,
vinegar,
wash
Saturday, May 7, 2011
The Grand Play-Dough Experiment: Kool Aid Play-Dough
My daughter has recently discovered the wonders of play-dough. I like regular, store-bought play-dough, but there are so many fun recipes out there that I thought it would be a travesty to not try at least some of them. So, I give you my eventual series of posts (assuming I keep feeling well): the Grand Play-Dough Experiment!
I plan to make a different play-dough every couple of weeks, evaluate it a bit the first week, then eventually update the post to include how long it lasted and final impressions of that recipe. If I do not evaluate an aspect of play-dough that is important to you, please feel free to leave a comment asking for that info. I will be happy to update the post as long as the play-dough is still fresh enough to be worked with (or I happen to remember the details you desire).
This week we made Kool Aid Play-dough. I will add the recipe here because there are no guarantees that links will work forever.
Kool Aid Play-Dough
1 cup water
3 teaspoons of Cream of Tartar
1 cup of flour
1 package of Kool-Aid Mix (any flavor of unsweetened)
1 tablespoon of cooking oil
1/2 cup of salt
Mix dry ingredients in a large/medium pan. Add water and oil. Stir over medium heat until it looks like dough. Whatever the color of koolaid used should be the end result. This takes about 8 minutes. This recipe is 100% edible and can be eaten immediately.
We used a grape packet...
Warming the water.
Newly mixed dough.
After kneading a bit (I ended up needing to knead it for quite a while to get it to a good, consistent texture).
Initial impressions:
-easy to make
-other flavors of kool aid would smell good, but I can't stand the grape smell
-nice, deep color
-color stays in the dough (only very slight staining on my fingers during initial kneading)
-grainy, but improves with kneading and playing
-leaves a residue on the hands and play surface (but easy to clean)
-nice and soft
After playing a while:
- I CANNOT stand the smell of the grape flavor
-still slightly grainy after playing with it several times this week
-storing well at room temperature
A note from a friend who loves kool aid play-dough: "the 'blue raspberry' and 'lemonade' (or lemonade blends) of kool-aid packets do NOT work well, way way too sticky."
After two weeks of play and storage:
-Very nice, smooth texture. All graininess is gone.
-Smell is still there.
-Color is beautiful.
-Still soft and moist. Doesn't dry out during play.
After almost a month this play-dough is still going strong (and still smells, too!).
After 6 months, this play-dough has not yet gone bad. However, it has become extremely sticky. I tried kneading it in some flour and it remained pretty sticky. I think it's time for us to say good-bye to this play-dough. I'm sure it could be saved but it probably isn't worth the effort.
Update on 7/18/12: I have made this recipe several times and it has become my favorite. Our daughter loves mixing all the dries together and then watching as it changes color when we add the water. It's definitely a great recipe!
~Regina
Other posts in the Grand Play-Dough Experiment Series:
Traditional (Baking Soda) Play-Dough
Coffee Play-Dough
Gingerbread Play-Dough
I plan to make a different play-dough every couple of weeks, evaluate it a bit the first week, then eventually update the post to include how long it lasted and final impressions of that recipe. If I do not evaluate an aspect of play-dough that is important to you, please feel free to leave a comment asking for that info. I will be happy to update the post as long as the play-dough is still fresh enough to be worked with (or I happen to remember the details you desire).
This week we made Kool Aid Play-dough. I will add the recipe here because there are no guarantees that links will work forever.
Kool Aid Play-Dough
1 cup water
3 teaspoons of Cream of Tartar
1 cup of flour
1 package of Kool-Aid Mix (any flavor of unsweetened)
1 tablespoon of cooking oil
1/2 cup of salt
Mix dry ingredients in a large/medium pan. Add water and oil. Stir over medium heat until it looks like dough. Whatever the color of koolaid used should be the end result. This takes about 8 minutes. This recipe is 100% edible and can be eaten immediately.
We used a grape packet...
Warming the water.
Newly mixed dough.
After kneading a bit (I ended up needing to knead it for quite a while to get it to a good, consistent texture).
Initial impressions:
-easy to make
-other flavors of kool aid would smell good, but I can't stand the grape smell
-nice, deep color
-color stays in the dough (only very slight staining on my fingers during initial kneading)
-grainy, but improves with kneading and playing
-leaves a residue on the hands and play surface (but easy to clean)
-nice and soft
- I CANNOT stand the smell of the grape flavor
-still slightly grainy after playing with it several times this week
-storing well at room temperature
A note from a friend who loves kool aid play-dough: "the 'blue raspberry' and 'lemonade' (or lemonade blends) of kool-aid packets do NOT work well, way way too sticky."
After two weeks of play and storage:
-Very nice, smooth texture. All graininess is gone.
-Smell is still there.
-Color is beautiful.
-Still soft and moist. Doesn't dry out during play.
After almost a month this play-dough is still going strong (and still smells, too!).
After 6 months, this play-dough has not yet gone bad. However, it has become extremely sticky. I tried kneading it in some flour and it remained pretty sticky. I think it's time for us to say good-bye to this play-dough. I'm sure it could be saved but it probably isn't worth the effort.
Update on 7/18/12: I have made this recipe several times and it has become my favorite. Our daughter loves mixing all the dries together and then watching as it changes color when we add the water. It's definitely a great recipe!
~Regina
Other posts in the Grand Play-Dough Experiment Series:
Traditional (Baking Soda) Play-Dough
Coffee Play-Dough
Gingerbread Play-Dough
Labels:
dough,
drink mix,
experiment,
kool aid,
play,
play dough,
play-doh,
play-dough,
purple
Thursday, November 4, 2010
Pizza Variation: Pizza Pockets
Let's face it: after a while the plain, old pizza pie gets kind of boring. So, I try to come up with ways to make pizza new and exciting to eat. I got the inspiration for this idea from Ourbestbites.com's Stuffed Pizza Rolls. I made the rolls and found them yummy, but very time-consuming, so I set out to figure out something faster and easier. This, my friends, is what I came up with.
Pizza Pockets
If you do not have my pizza dough recipe and want it, it's over here.
Prep time: 1 hour 15 minutes (from beginning to mix the dough to putting the pockets in the oven)
Oven: 425 degrees F
Bake time: 8 minutes
Yield: approximately 4 dozen 2x3 pizza pockets
So...make a double recipe of pizza dough, whatever is your favorite dough, but I highly recommend my own, linked above. :) Let it rest and rise a bit and get your toppings prepared while you wait. Once it's rested about 10 minutes, pull it out and divide it in half (so you have two single-pizza crust dough lumps) and rolls one out on a well-floured surface. And I mean well-floured because, well, you'll see...
A quick note on rolling dough out: I've found it easiest to press the dough out into the approximate shape I want it before rolling it thin. So with this dough, I pressed it into a small rectangle before going at it with my rolling pin. Obviously, the picture below does not show a rectangle--I didn't think of taking a picture of me pressing it out! This is just a lump of dough...
Roll it out and flour it on the top--we don't want this sticky at all! This dough was rolled rather thinly, about between 1/4 and 1/8 of an inch. The sheet of dough was roughly 16x24 inches. I didn't measure it precisely--I'm not really into precision on these types of things--so just do whatever looks good to you (or whatever you have space for!).
Now, here's why you floured it so much: you need to be able to set aside the already rolled-out dough. If you have a nice kitchen with plenty of country space, you don't have to do this, but you do need to be able to move this piece of dough onto the top of the other piece of dough in the near future, and I've found it easiest to move large sheets of dough by rolling them up.
OK, so we set aside the first sheet of dough--on to the next one! Re-flour your surface and roll out your second lump of dough. You want to try to get it about the same dimensions as the first one.
Now, take those toppings you got ready and place them on the dough in a kind of grid. I imagined that I would make my pizza pockets about 2.5x2.5 inches, so I tried to space my toppings accordingly. You'll notice that I left the cheese out of a couple of the soon-to-be pockets--that's because my daughter and dairy don't exactly get along the greatest, but with the pizza pockets, it's easy to make some for just her.
I did just basic toppings: cheese and pepperoni. We aren't supreme pizza kind of people around here.
Now, take the sheet of dough that you rolled up and set aside and bring it back over to your work area. Match up the edges of the dough sheets and unroll the top one.
Oops! I ran out of dough! No problem, I'll just use some of the scraps that I cut off later to finish the lonely pizza pockets.
Press down the dough in between all the toppings to seal them into their little square pockets. Of course, the toppings are now inside their pockets, so I guess they're fillings, not toppings....oh well, let's not get hung up on technicalities. ;)
Ready for cutting! I like to use my pizza wheel to cut my dough. I've found that it's much easier than using a knife. It doesn't pull through the dough like running a knife through it would and, since this is a non-stick pizza wheel, the dough doesn't stick!
Cut out all the pockets and trim off excess dough. Set aside the excess so that you can finish off the pockets that the top crust didn't quite reach.
Transfer the individual pockets onto a cookie sheet. I like to line my sheets with parchment paper, so I don't have to grease them. But if you use plain cookie sheets or foil-covered cookie sheets, you'll want to grease (and possibly flour or cornmeal) them so that everything comes off of the sheets easily (especially that melted cheese!). Poke holes in the tops of the pockets to let steam escape.
Bake at 425 degrees F for about 8 minutes. Adjust the time for your oven so that you get nice golden brown pizza pockets.
Let them cool a little and pull them off the sheets onto a plate for serving. Mmmm! I'm hungry!
Dip them in pizza sauce or just eat them plain!
This recipe fed our small family of 3 for 2 full meals and another of just me and our daughter. At each meal my husband and I each ate about 7 pockets and our 21 month old daughter ate about 4. We reheated the pockets in a 350 degree F oven for 8-10 minutes and they reheated VERY well. This recipe definitely got 5 stars for our family.
~Regina
Feel free to post a comment if you have any questions. The comments are moderated, so I should see any questions, no matter how long it has been since this post was published.
Pizza Pockets
If you do not have my pizza dough recipe and want it, it's over here.
Prep time: 1 hour 15 minutes (from beginning to mix the dough to putting the pockets in the oven)
Oven: 425 degrees F
Bake time: 8 minutes
Yield: approximately 4 dozen 2x3 pizza pockets
So...make a double recipe of pizza dough, whatever is your favorite dough, but I highly recommend my own, linked above. :) Let it rest and rise a bit and get your toppings prepared while you wait. Once it's rested about 10 minutes, pull it out and divide it in half (so you have two single-pizza crust dough lumps) and rolls one out on a well-floured surface. And I mean well-floured because, well, you'll see...
A quick note on rolling dough out: I've found it easiest to press the dough out into the approximate shape I want it before rolling it thin. So with this dough, I pressed it into a small rectangle before going at it with my rolling pin. Obviously, the picture below does not show a rectangle--I didn't think of taking a picture of me pressing it out! This is just a lump of dough...
Roll it out and flour it on the top--we don't want this sticky at all! This dough was rolled rather thinly, about between 1/4 and 1/8 of an inch. The sheet of dough was roughly 16x24 inches. I didn't measure it precisely--I'm not really into precision on these types of things--so just do whatever looks good to you (or whatever you have space for!).
Now, here's why you floured it so much: you need to be able to set aside the already rolled-out dough. If you have a nice kitchen with plenty of country space, you don't have to do this, but you do need to be able to move this piece of dough onto the top of the other piece of dough in the near future, and I've found it easiest to move large sheets of dough by rolling them up.
OK, so we set aside the first sheet of dough--on to the next one! Re-flour your surface and roll out your second lump of dough. You want to try to get it about the same dimensions as the first one.
Now, take those toppings you got ready and place them on the dough in a kind of grid. I imagined that I would make my pizza pockets about 2.5x2.5 inches, so I tried to space my toppings accordingly. You'll notice that I left the cheese out of a couple of the soon-to-be pockets--that's because my daughter and dairy don't exactly get along the greatest, but with the pizza pockets, it's easy to make some for just her.
I did just basic toppings: cheese and pepperoni. We aren't supreme pizza kind of people around here.
Now, take the sheet of dough that you rolled up and set aside and bring it back over to your work area. Match up the edges of the dough sheets and unroll the top one.
Oops! I ran out of dough! No problem, I'll just use some of the scraps that I cut off later to finish the lonely pizza pockets.
Press down the dough in between all the toppings to seal them into their little square pockets. Of course, the toppings are now inside their pockets, so I guess they're fillings, not toppings....oh well, let's not get hung up on technicalities. ;)
Ready for cutting! I like to use my pizza wheel to cut my dough. I've found that it's much easier than using a knife. It doesn't pull through the dough like running a knife through it would and, since this is a non-stick pizza wheel, the dough doesn't stick!
Cut out all the pockets and trim off excess dough. Set aside the excess so that you can finish off the pockets that the top crust didn't quite reach.
Transfer the individual pockets onto a cookie sheet. I like to line my sheets with parchment paper, so I don't have to grease them. But if you use plain cookie sheets or foil-covered cookie sheets, you'll want to grease (and possibly flour or cornmeal) them so that everything comes off of the sheets easily (especially that melted cheese!). Poke holes in the tops of the pockets to let steam escape.
Bake at 425 degrees F for about 8 minutes. Adjust the time for your oven so that you get nice golden brown pizza pockets.
Let them cool a little and pull them off the sheets onto a plate for serving. Mmmm! I'm hungry!
Dip them in pizza sauce or just eat them plain!
This recipe fed our small family of 3 for 2 full meals and another of just me and our daughter. At each meal my husband and I each ate about 7 pockets and our 21 month old daughter ate about 4. We reheated the pockets in a 350 degree F oven for 8-10 minutes and they reheated VERY well. This recipe definitely got 5 stars for our family.
~Regina
Feel free to post a comment if you have any questions. The comments are moderated, so I should see any questions, no matter how long it has been since this post was published.
Subscribe to:
Posts (Atom)