First off, let me apologize for how long it has taken for me to get this recipe up. It's been a rough month, but we've moved to a new house and things are looking up. Once I dig us out of the piles of boxes and heaps of homeless things, we'll be good to go! :)
Cinnamon Rolls
1 tablespoon yeast
1 cup milk
3 tablespoons butter
1/3 cup sugar (can replace with 1/3 cup of honey)
1-2 teaspoons cinnamon
2 1/2-3 cups cups flour
1 teaspoon salt
Prep time: 3-ish hours
Oven: 375 degrees F
Bake time: 15-20 minutes
Yield: 2 dozen cinnamon rolls (1 9x13)
Note: I originally wrote this recipe out for a friend who didn't have a mixer, so that's why it's a bit different.
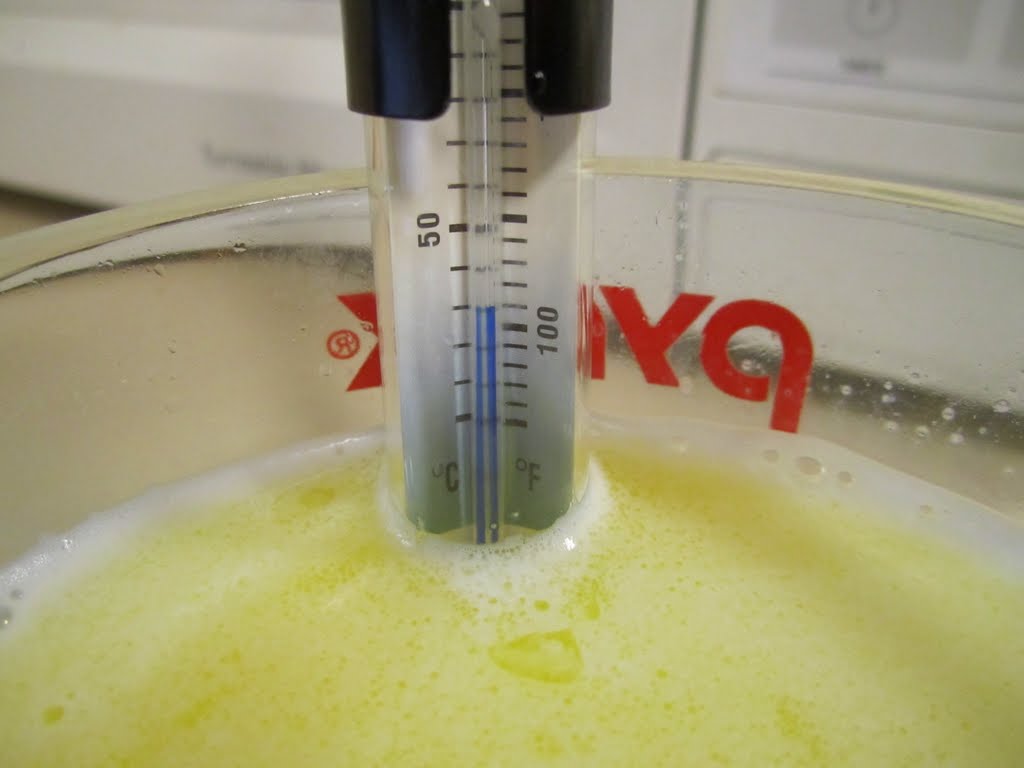
Measure your 1 cup of milk into a microwave-safe bowl and add the 3 tablespoons butter. Microwave for about 1 minute--you want the butter to melt into the milk but you don't want it to get too hot! I almost always kill my yeast the first time around on this by microwaving my milk and butter too long. You'll need to stir the milk until the butter has melted completely. The thermometer in my mixture reads 105 F, but my thermometer reads 5 degrees low, so this is actually 110 degrees F.
Place yeast and sugar into a largish bowl (or your mixer's bowl) and pour the milk mixture over it. You might want to let this mixture sit a while to make sure the yeast wasn't killed by the milk, but I don't necessarily do this. Add flour, cinnamon, and salt (make sure to sprinkle the salt evenly to help with it mixing in). Remember, this dough is normally very soft, you'll want a slightly stiffer dough for rolling it out, so add a bit more flour to accomplish that.
Mix, mix, mix until the dough has come together into a fairly non-lumpy dough. It will be very soft, feel free to add flour until you like how it feels. Turn out onto a floured surface and knead until the dough is smooth and elastic. This should only take a few minutes and shouldn't be too difficult. (OR just turn on your mixer with the dough hook attachment and let it mix and knead the dough until it's smooth and elastic.)
Grease a large bowl and place your ball of dough into it, turning to coat. Cover with a wet towel and let rise in a warm place. I prefer to boil some water, pour it into a bowl, and put it in a warm oven with my uncovered bowl of dough--it works better for me. This dough is very slooooow. I think mine took 2 hours on the first rise to double (note: it only took about an hour the second time I made this recipe). I did a second rise (out of necessity since I had to put my daughter down for her nap), which only took 30-45 minutes.
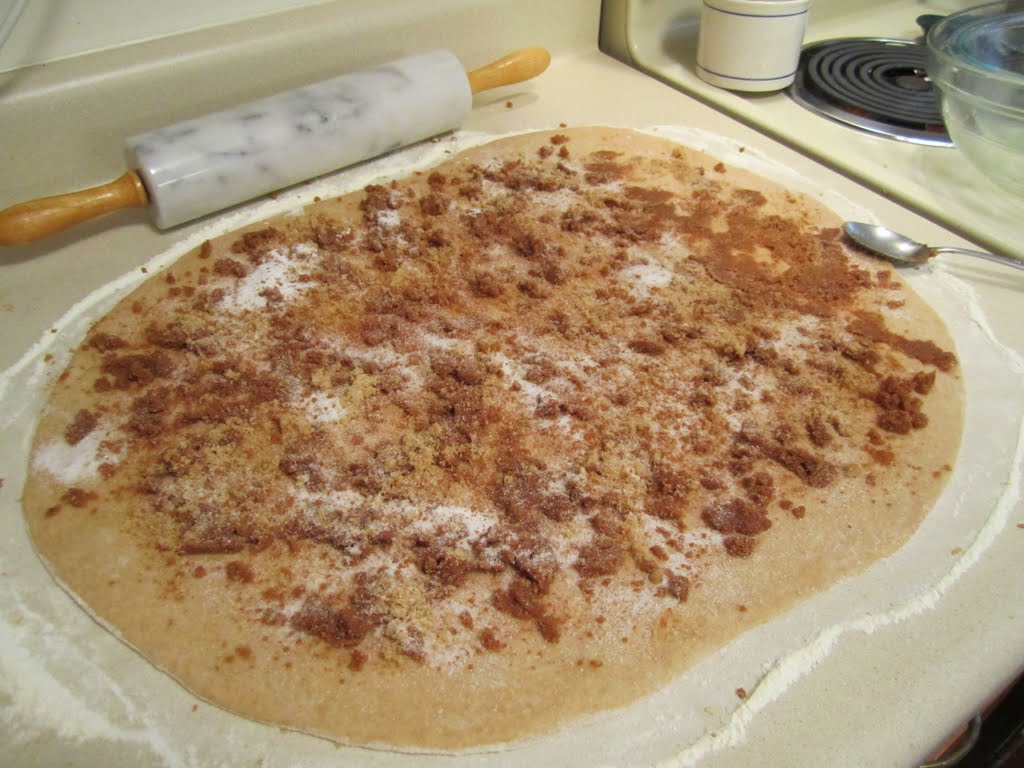
Once you've let your dough rise as much as you desire, turn it out onto a well-floured surface and roll out until thin. I made mine 1/8-1/4 inch thick (my piece of dough was 19ish by 14ish inches). Now, for filling, I don't use any exact measurements. I do about 1/2 cup soft butter, 1/3-1/2 cup brown sugar, 1/4 ish cup of white sugar, 1 tablespoon ish of cinnamon, and some flour if I feel like it. Sometimes I throw in some cloves and nutmeg, too. I mix it all together and sprinkle/rub it onto my dough. If I don't like the coverage, I sprinkle more of the sugars and cinnamon over it all.
Starting at a long side, roll the dough up. Now, for cutting, I prefer to use thread or floss, but a knife should work just fine. With the thread, I run it under the roll of dough and cross it over the top and pull and it cuts nicely from all directions (make sense? Probably not unless you've done it before). You'll want to cut the roll into 24 pieces.
Grease a 9x13 (or two 8x8s) and place the rolls into it. Cover (or place in a warm oven with boiled water) and let rise until you like how much they've risen. I let mine go 30-60 minutes, but they could go longer if you really want them fluffy.
Before rising:
After rising:
Bake at 375 F for 15-20 minutes. The tops of the rolls should be nice and brown.
Flip out onto a foil-covered cooling rack and allow to cool. Here's how I do it: place foil over the top of the pan, then put the rack over the foil. Grasp the pan's handles, foil, and rack on each side with hot pads and quickly flip it all over.
Once you've got the whole thing inverted, slip a knife under one of the pan's handles and lift. Quickly grab the handle with a hot pad and lift it away from the rolls. They should all come right out without sticking, assuming that your pan is still nice and hot.
I don't do any icing or topping, but you certainly can. If so I suggest pouring it on while the rolls are hot.
:) The rolls will be gooey and sticky and slightly doughy in the middle. Enjoy once they're cool enough to touch! Careful not to burn yourself!
Feel free to post in the comments if you have any questions! If anything sounds confusing or odd, it's probably because I'm sleep-deprived; please, please, please point it out to me!
A special thanks to my friend Katrina for being my tester for this recipe! :)
~Regina