I made wrench rolls for my husband for Christmas. I am very pleased with them and they seem to be working well for my husband, so I thought I would share how I put them together.
A few pictures of the finished product to help you understand what we're working with...
I started off by measuring my husband's existing plastic, flimsy wrench rolls and cutting up some old jeans into the sizes I needed. These weren't perfect by any means, I definitely made some adjustments to them as I worked with them. Every set of wrenches is slightly different, so you will need to start from an existing holder. Sorry.
I ironed the raw edges under and pinned it down to stitch it. I did the pockets' binding first, pinned the pocket to the main piece of fabric, and then prepared to stitch the binding and the pocket on at the same time.
After doing the pockets' binding, I realized that it was easiest to align the binding as I went since I was just doing the first side.
Then I flipped the binding over to the other side and pinned it down all around. I did do mitered corners on this project, but I'm really bad at them, so I'm not going to show those off. ;)
Yes, the stitching from attaching the second side of binding does show on the other side, but it looked nice enough to me that I left it. You can always use a bobbin thread that blends in with your fabric if you want to hide it better.
Now that you have the pocket and binding attached, it's time to sew the individual pockets for the wrenches. I measured the individual pockets and wrote down each size. As you will see later, I ended up with an extra pocket at the end of each roll--better too much fabric than too little! I also found that the fabric stretches a bit, so making the pockets a bit smaller (up to 1/4 inch) than the original holder's pocket size worked well.
I used my little hem ruler to set the distance of my quilting guide bar from the needle. If you don't have a quilting guide bar, then drawing the lines on your fabric with fabric chalk or a disappearing ink would work (possibly better, actually).
Stitch those lines--I did from the lower edge of the binding of the top of the pocket into the binding at the bottom of the roll. Do what you like.
Almost done! Make a tie from matching fabric, I just folded the binding over and sewed it up. I kind of guessed at the length, but they're nice and long, probably about 40 inches total, if not more (no, I didn't measure).
Now, if you don't want to label the pockets, roll it up and you're done!
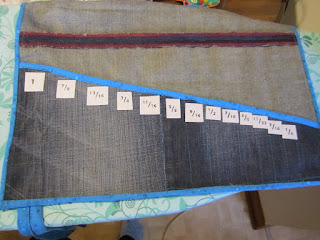
But, if you want to add labels to each pocket, read on... Copy all the numbers you need and type them up. Mess with your font size until you're sure all the numbers will fit on the pockets. I had to print 3 or 4 versions of my numbers until I got it right. Once you have the right size, then you can print directly onto some freezer paper (the dull side!) if your printer will let you or you can just lay the paper under your freezer paper as a guide. Cut it all out with an X-acto knife. Yes, this is a big pain. Iron on your number stencils and you're ready to paint.
These fractions were a pain and a half to get the sizing right and to cut out...Up close.
Now, here is where you do what I say and not what I did. I just went ahead and painted on my white paint, forgetting that the first layer of paint tends to soak into the fabric. So I ended up with something like this.
I had to go back with a dark paint and touch up every number so that they were readable.
INSTEAD, start with a paint that blends in, like black in this case.
Let the first layer dry well so that there's no mixing of colors and then paint your contrasting color over top. You might need to do two layers, but I didn't.
It came out MUCH better that way.
Once all your paint is well-dried, heat set the paint according to the paint's instructions. Mine call for ironing on a hot setting with a cloth over the paint.
Wrap them up, tie, and you're all done!
Whoo-hoo!
~Regina


No comments:
Post a Comment