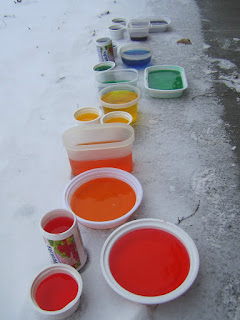
Up for some winter fun? If the weather outside is hanging out below freezing, then this something for you and your kiddos!
This is a seriously simple project, but it's lots of fun. Our 3 year old daughter had fun "helping" me.
I did about 4 cups of each color. I just used regular liquid food coloring and added color until I liked how it looked. Liquid watercolors would probably work really well, also.
We poured the colors into all sorts of containers for freezing. Make sure to use containers that are wider at the top than at the bottom so that the blocks pop out nicely. I made the mistake of using cleaned juice "cans" and couldn't get the blocks out for 2 days! Oops.
An excited little girl.
Pretty colors! I did two mini-muffins of each color. I found that the purple turned kind of black as it froze, but the other colors worked out great.
We lined them all up outside and left them for 2 days.
Frozen! See how the purple (in the upper right corner) has turned blackish?
We timed our ice blocks really well. We had two really cold days to get them nice and solid, then the third day was a bit warmer so that the blocks came out a bit more easily.
I even bundled up our little guy to come watch. Sunlight is good for all of us!
Stacking...
Building...
So many possibilities!
Our daughter insisted that this is a parking garage (what??!) but it looks like an ice castle to me. :)
Twenty-four hours later, this is what our ice castle looked like.
I love how the color ended up concentrated in one area.
The castle stuck around for 2 to 2 and a half days before completely melting away. If your weather stayed colder, then that wouldn't be an issue. Just make sure to build it somewhere where it won't be in the way all winter!
Happy building!
~Regina


Cool!
ReplyDelete